Object
This serial of posts is to demonstrate the Nutanix VMware Cluster Field Installation process with step-by-step procedures. Part 5 is for vCentre Cluster configuration, licensing, and cleanup configuration. It will also list the common Nutanix NCC alerts and the fix for them.
Clarification
- Nutanix VMware Cluster is very similar to VMware’s in-house Vxrail/vSAN, but still different, always refer to Nutanix’s official best practice to avoid unexpected issues.
- Nutanix Hardware comes with AHV and a “Starter” license, you would purchase a “Pro” or “Ultimate” license if you need extra functionalities. Please refer to the below link for a detailed comparison.
https://www.nutanix.com/au/products/software-options
vCenter Cluster Settings
Nutanix Official website has very detailed configuration procedures. Please refer to the below link to complete the vCenter configuration, select your manual based on your AOS version.
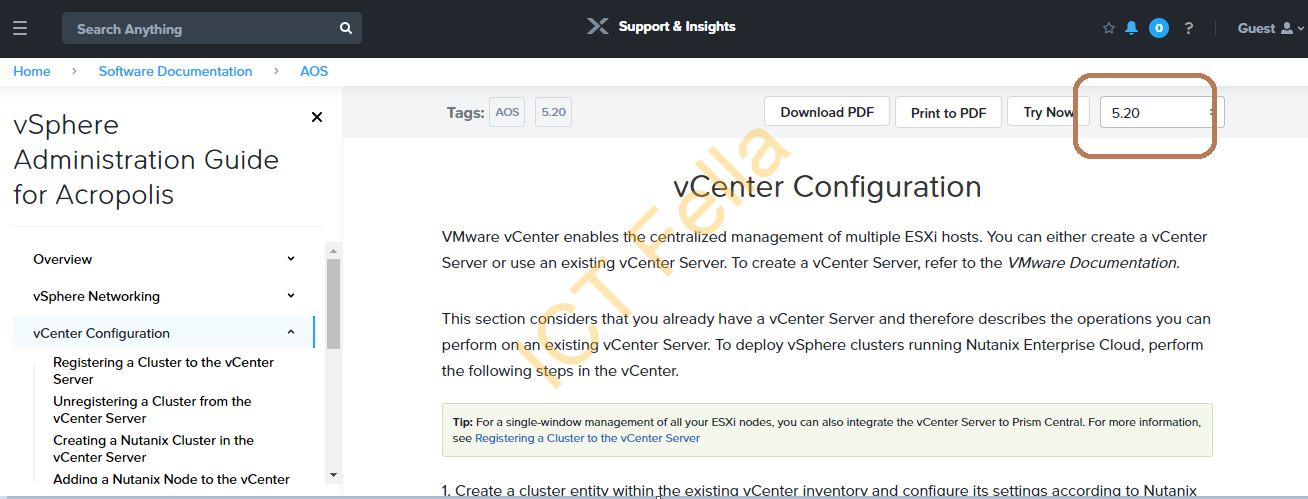
Keypoints of the vCenter Configuration
1.vCenter registration from Nutanix Prism, recommend using the local SSO account such as [email protected].
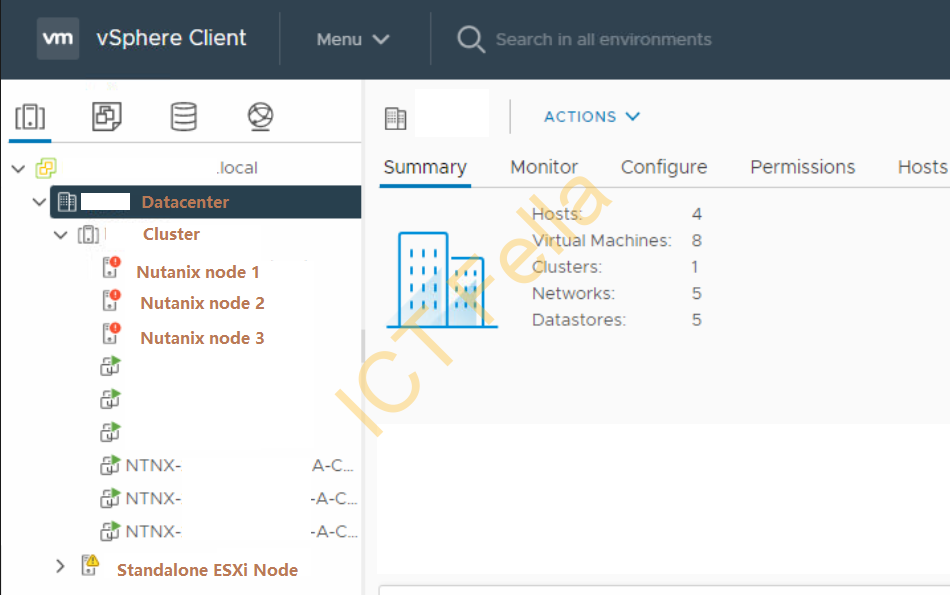
2. VMware Cluster configuration is created correctly, please be aware of the difference between Datacenter and Cluster, if you place all your nodes under Datacenter directly, HA will never work, and you will have a problem configuring CVM override as well.
3. vSphere HA, DRS and EVC settings.
4. VM Override settings for all Controller VMs (CVMs)
vCenter and vSphere Licensing
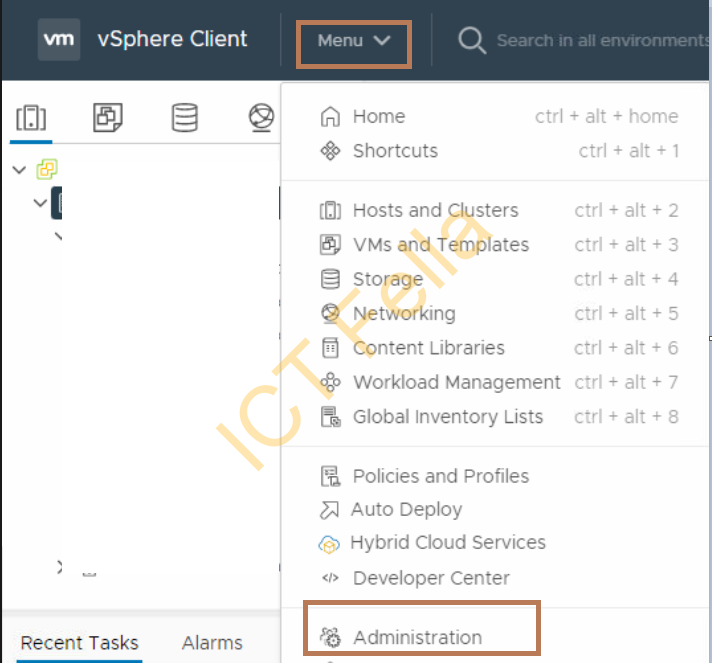
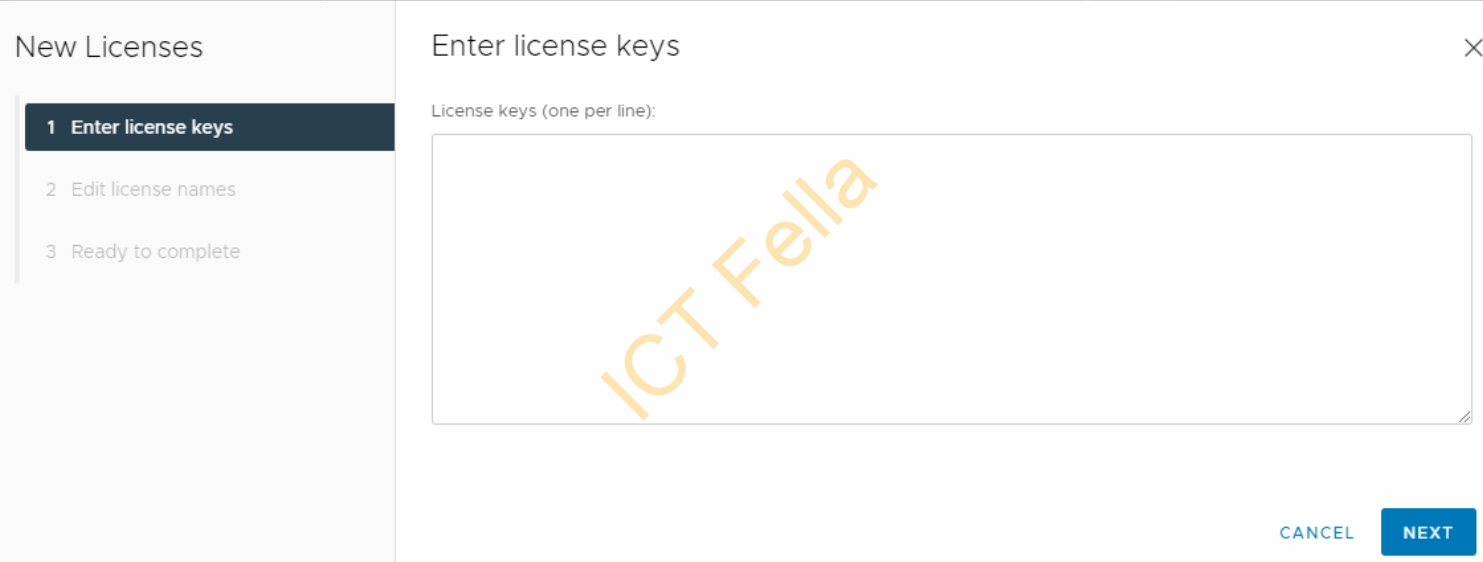
1. Go to the vCenter portal and select “Administration” from the dropdown “Menu”
2. Click the “ADD” button and follow the wizard to add both vCenter and vSphere license, default eval license is 60 days.
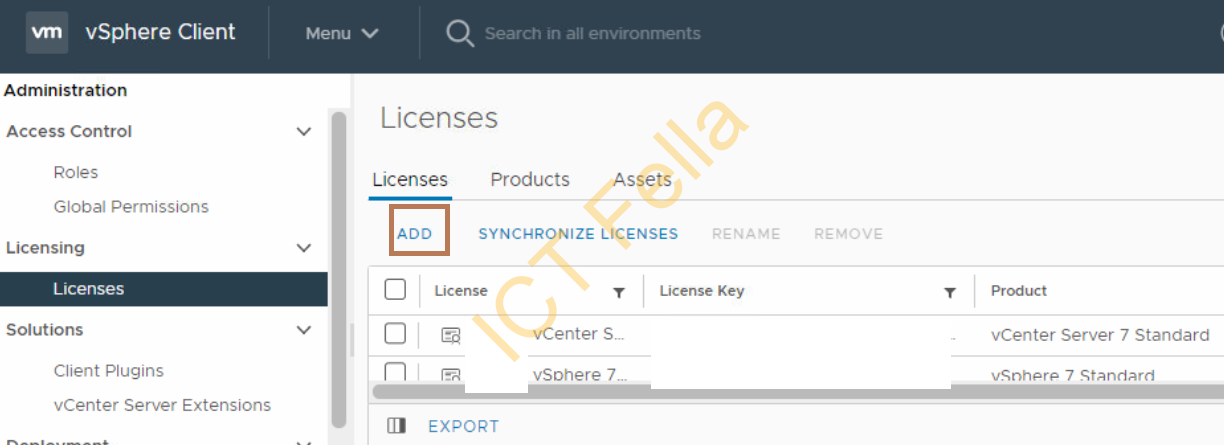
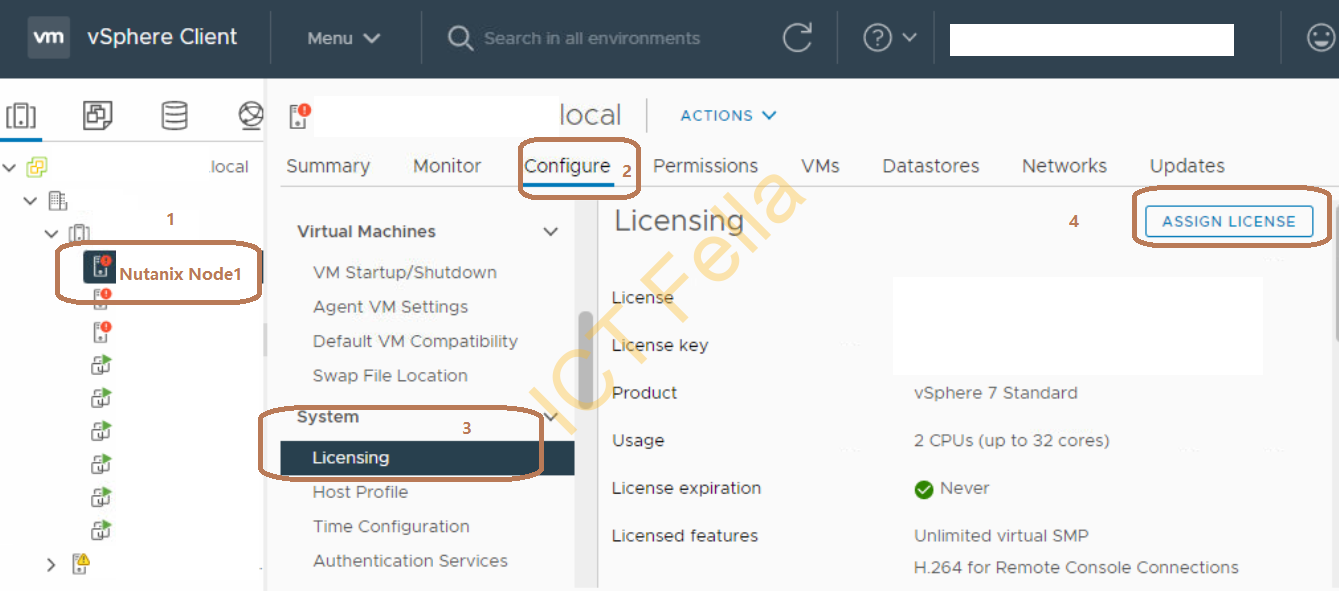
3. Assign a license to each node afterwards
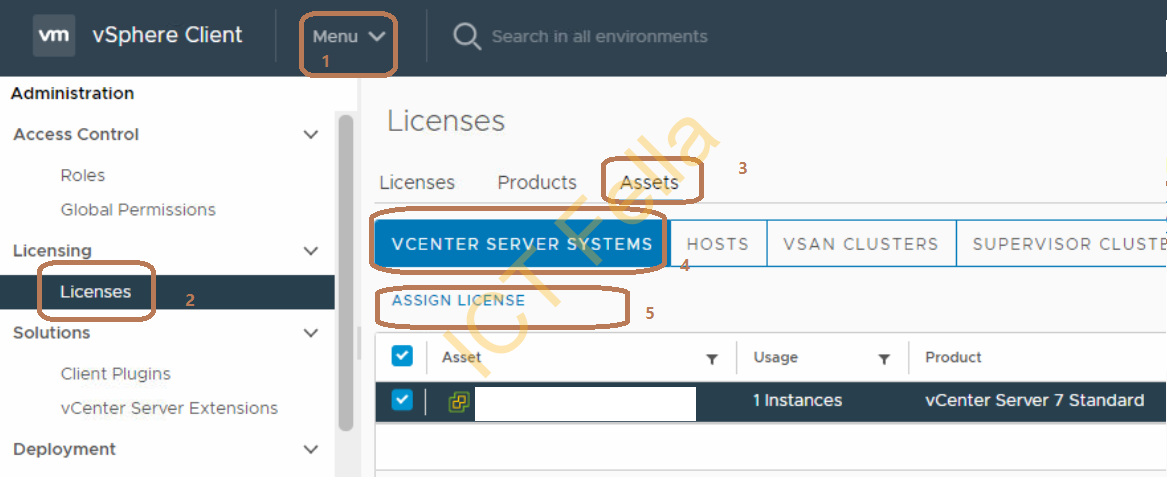
4. Assign a license to the vCenter server itself: Dropdown “Menu” – “licenses” – “Assets” – “vCenter Server Systems” – “Assign License”
Nutanix Licensing
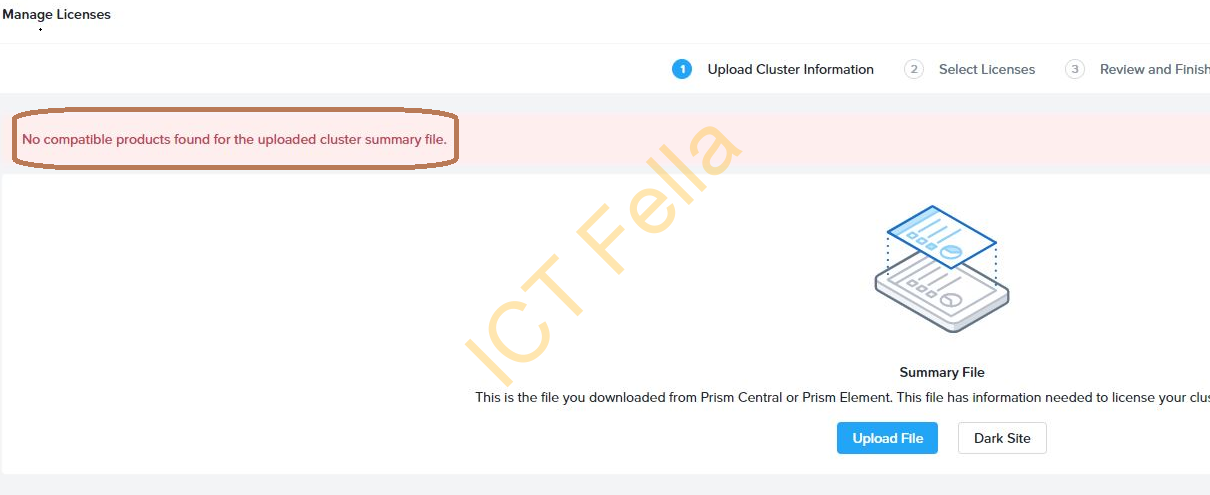
1. Create a Nutanix “customer” user, you can use [email protected] for example as your domain is tightened with your purchased licenses. You will get an error “No compatible products found for the uploaded cluster summary file” if you use a Partner login to “upload” the cluster summary file.
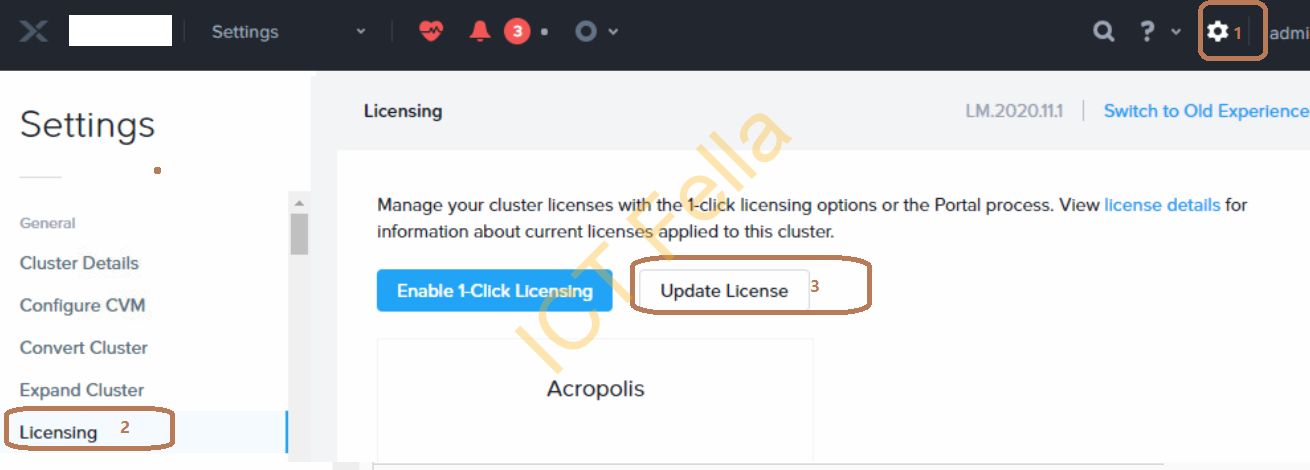
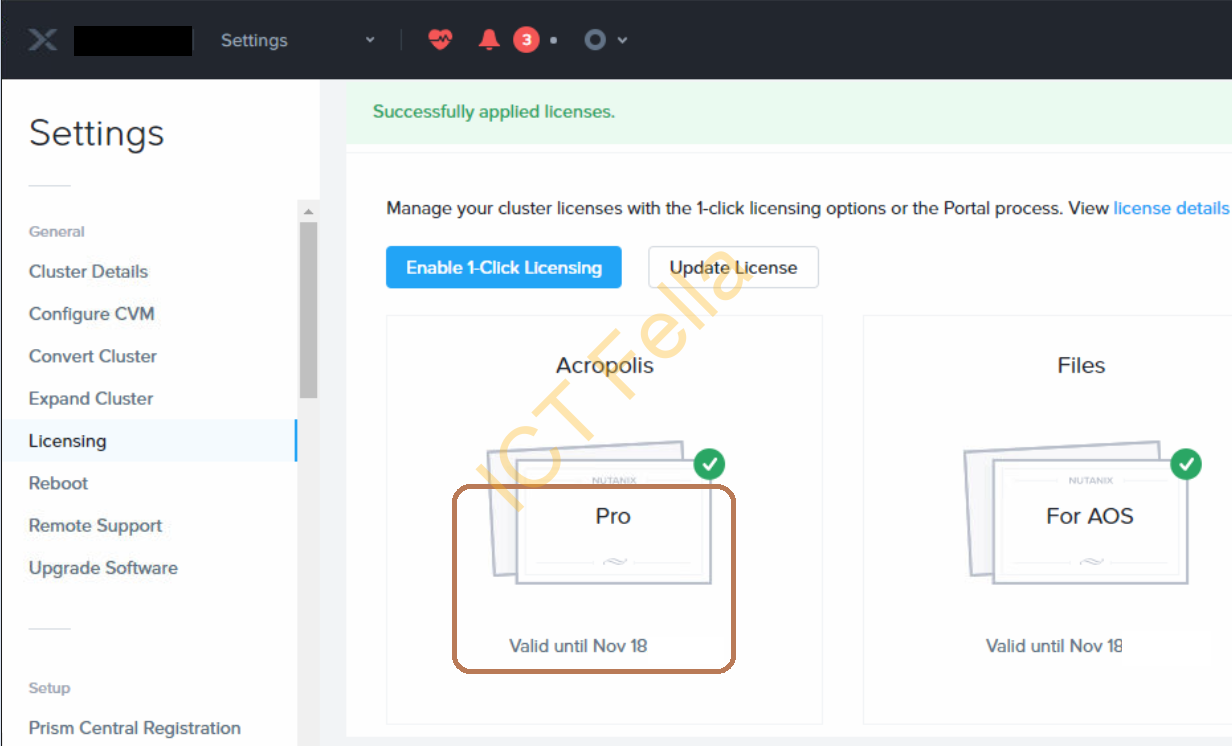
2. Log into Nutanix Prism, click the “gear icon” – “licensing”- “Update License”
3. Download the cluster summary file, it started with ntnx_csf_xxxxxxxxxxxx
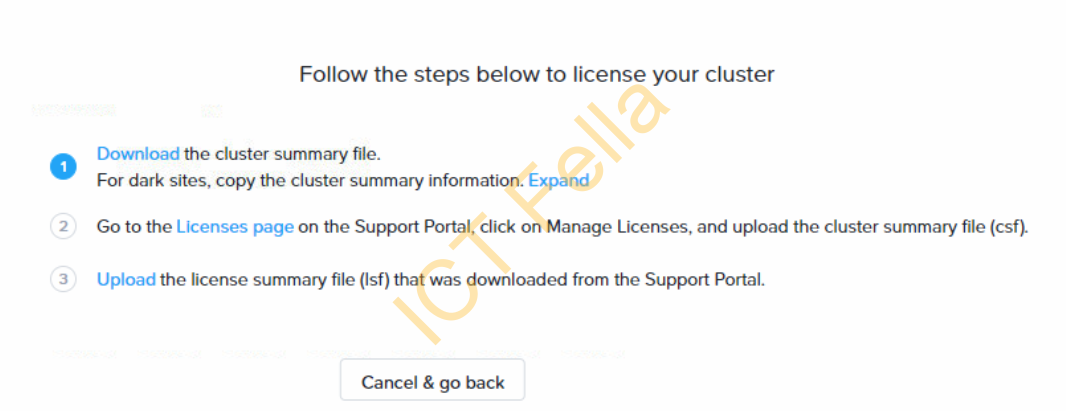
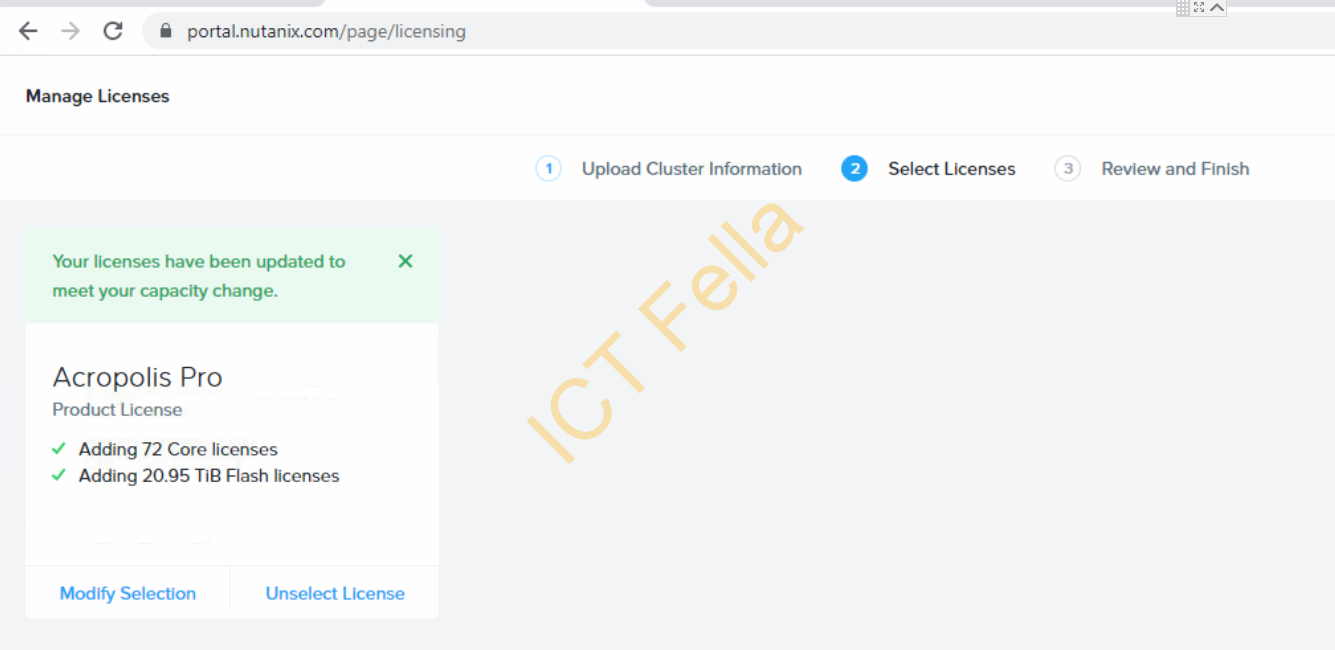
4. Go to the license page to upload the cluster summary file, you then select the licenses to assign to this cluster
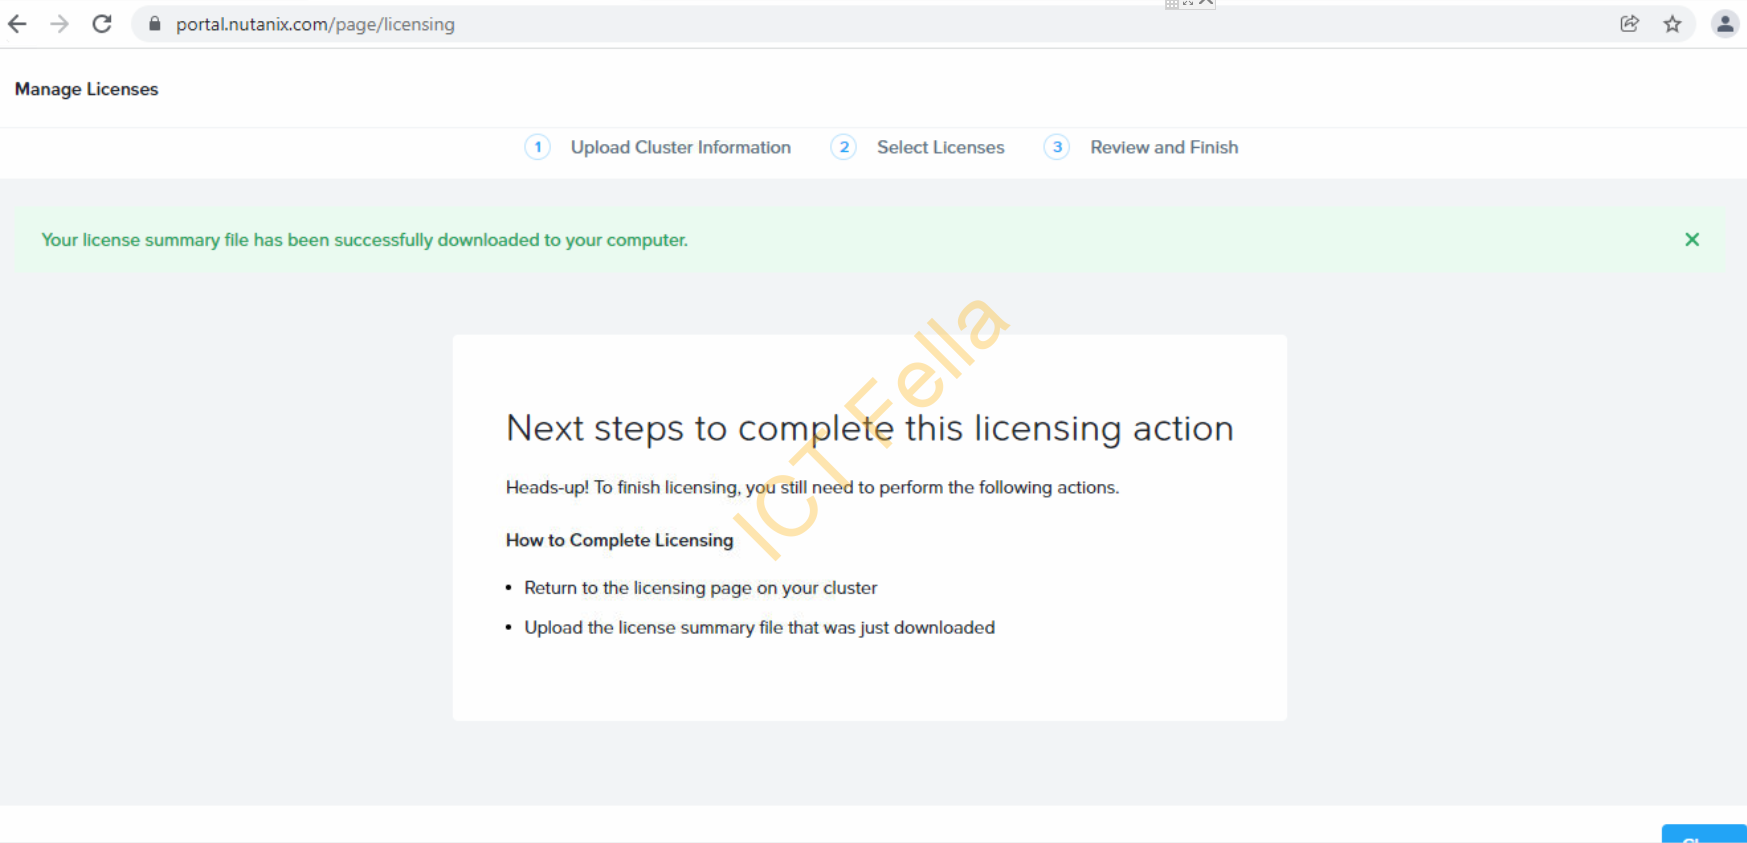
5. You can download the actual license file from the Nutanix portal, it starts with ntnx_lsf_XXXXXX, then you can upload it in Nutanix Prism
Typical Nutanix NCC Alerts and How to Fix
Nutnaix Cluster Check (NCC) is a very handy tool to analyze your cluster health status after field installation.
ncc health_checks run_all

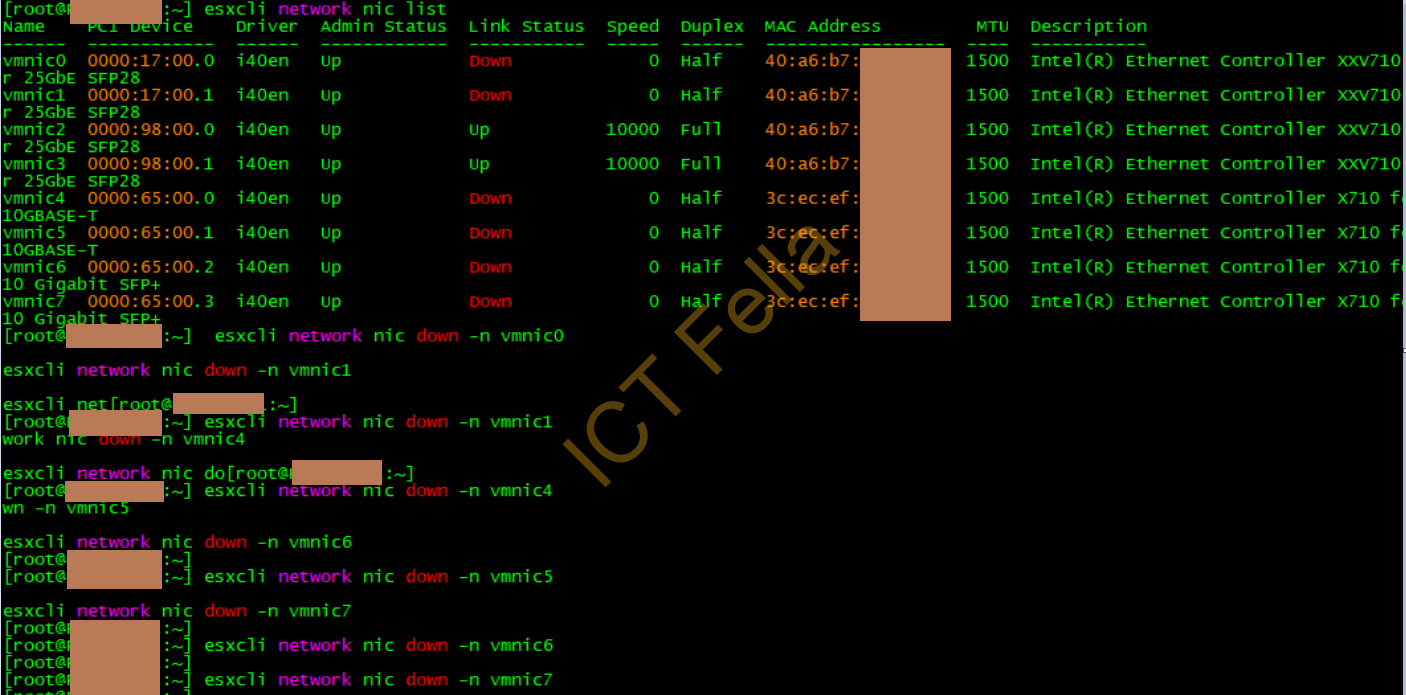
The link on NIC vmnic4 of host x.x.x.x is down. NIC description: Intel(R) Ethernet Controller X710 for 10GBASE-T.
It is simply because we are not using those NICs in production, the fix is straightforward: find out which port you are not using, then shut the NIC down in ESXi host CLI.
esxcli network nic list
esxcli network nic down -n vmnicX
NTP is not configured on host (x.x.x.x). Cluster ntp_servers or CVM Time Drifting error
The majority of the time is configured NTP server is reachable or has DNS issue. please follow the below rules when configuring NTP:
- Nutanix recommends using a public NTP server for both your ESXi host and CVM.
- Please make sure the NTP config for the host and CVM/Prism is consistent.It may take time (sometimes a day) for NTP to work if CVM time drifted a lot, so be patient after the configuration
- Please make sure the DNS config for the host and CVM/Prism is consistent.
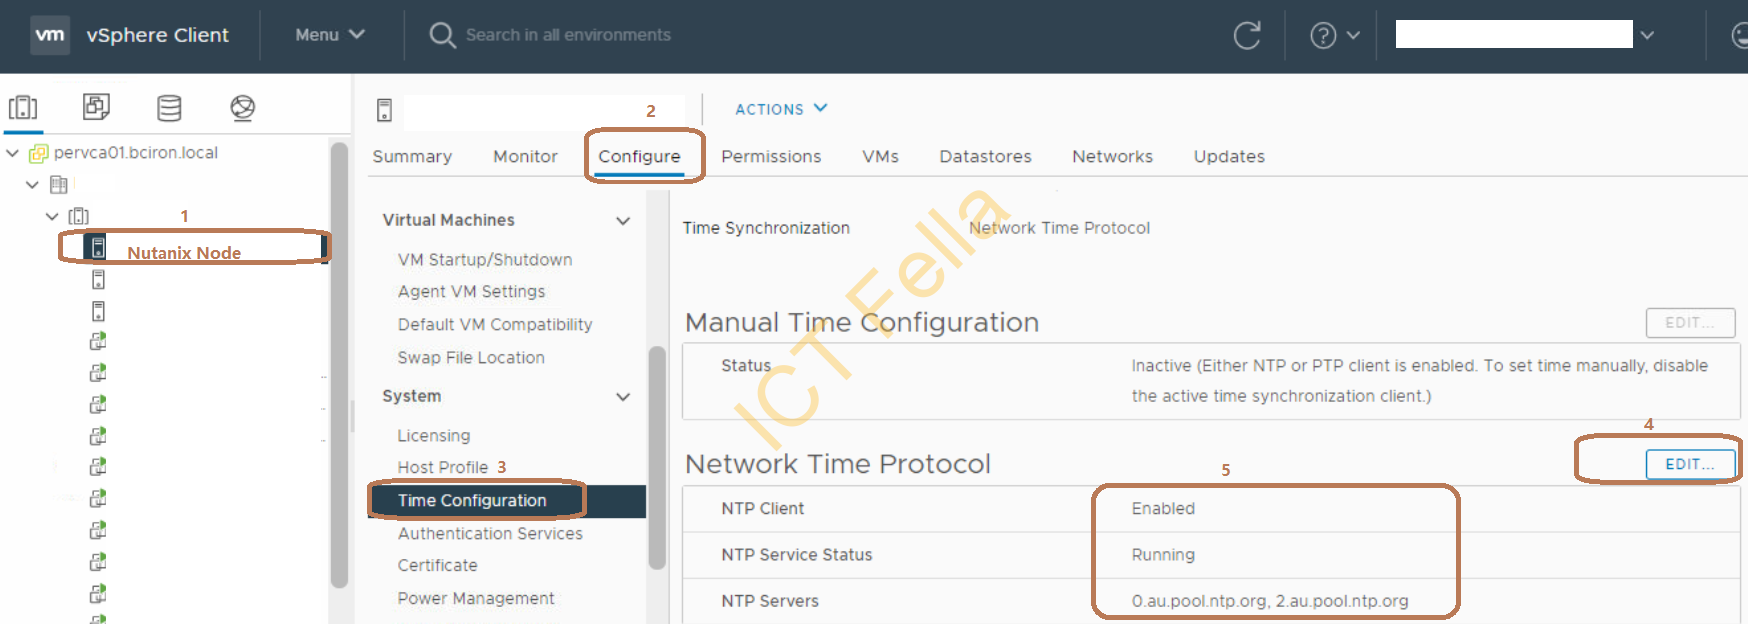
ESXi Host NTP configuration
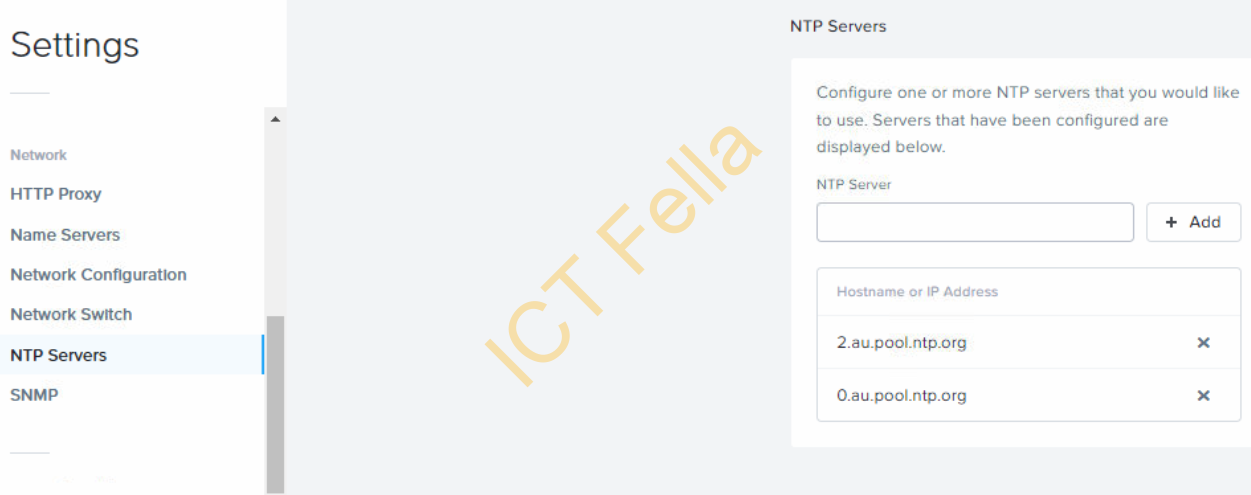
Prism NTP Configuration
Host Failover Test
Always do a HA failover test as part of the UAT process, you can simply shut down one node that has your live test VM, the test VM should automatically start up from another node after about several minutes.
Hope this serial of posts can help someone when comes to Nutanix VMware Field Installation.