Object
This serial of posts is to demonstrate the Nutanix VMware Cluster Field Installation process with step-by-step procedures. Part 2 is for the Foundation VM Imaging process.
Image Preparation
Nutanix supports ONLY a list of image files for Hypervisor ISO images, AOS/NOS images, please be cautious and only use the ISO listed in the ISO whitelist file, if your ISO file or image file is NOT listed, please do NOT use it.
You can download the latest allowlist file from the Foundation page on the Nutanix support portal (https://portal.nutanix.com/#/page/Foundation).
Use the below screenshot as an example, the latest supported ISO for VMware ESXi is 7.0.2a, and you will need to have “Foundation VM” at version 5.0 or above and “NOS” at version 5.15.5 and above. the “min_foundation” and “min_nos” indicate the versions that are required.

Upload your images file via WinSCP, Username nutanix Password nutanix/4u
Copy nutanix_installer_package-version#.tar.gz to the /home/nutanix/foundation/nos directory.To install hypervisors other than AHV, copy the ISO files to the corresponding directory on the Foundation VM as follows:
ESXi ISO image: /home/nutanix/foundation/isos/hypervisor/esx
Hyper-V ISO image: /home/nutanix/foundation/isos/hypervisor/hyperv

Physical Connection
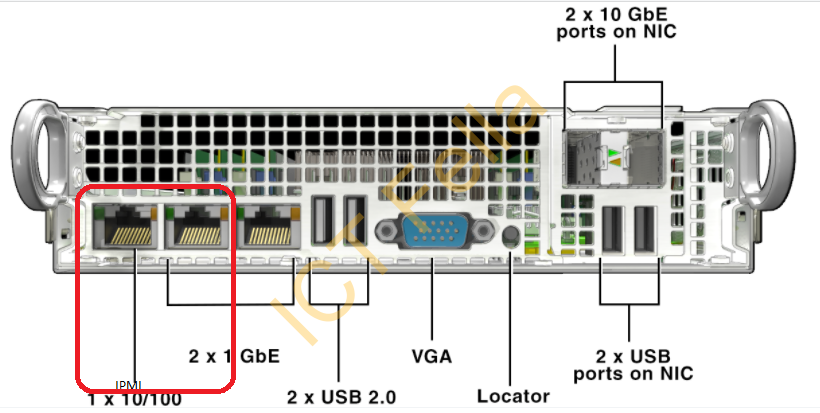
On EACH node, connect 1 x IPMI and 1 x 1GbE Data port on the switch, below picture indicates the IPMI and 1G Data port.
Sample Cisco Switch config, please be aware we will use the trunk port on the 10G data ports after the initial imaging process.
conf t
interface range GigabitEthernet1/0/1-7
description Nutanix_imaging
switchport access vlan 12
switchport mode access
end
wr
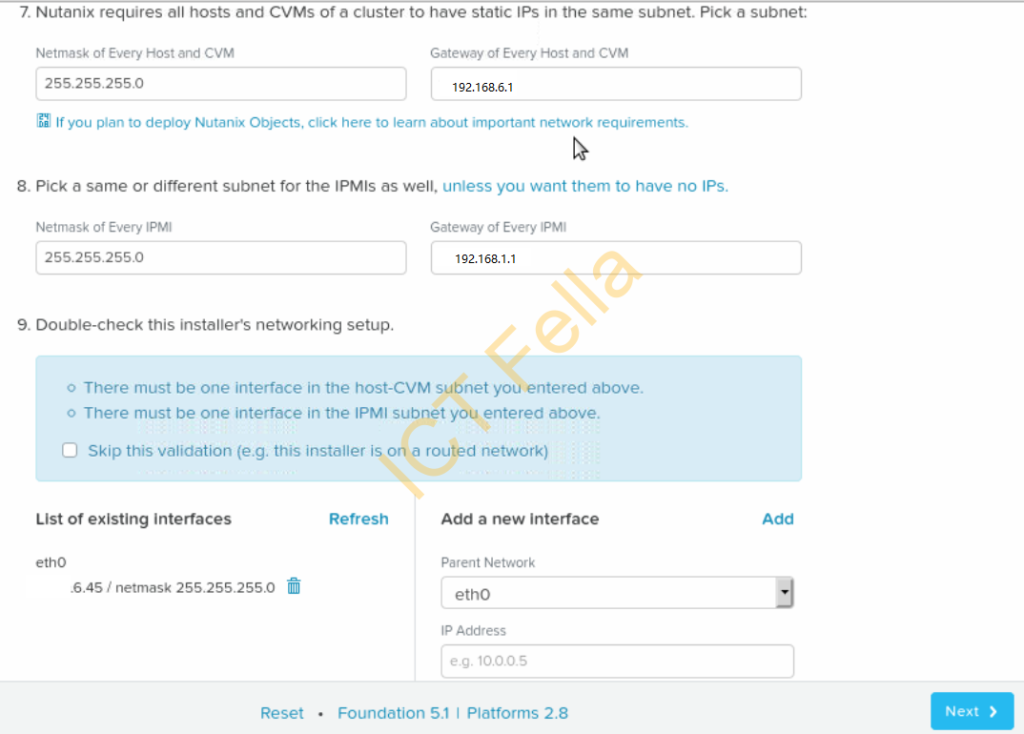
IP address planning and IPMI Manual configuration
This part is critical as it is pretty difficult if you want to change the hostname or host/CVM IP after the imaging. If you do want to change it after the successful imaging, I would suggest you run the foundation build again.
Prepare a table like below and note down the default IPMI Password, it is actually the serial number of that node.
| Node 1 | Node 2 | Node 3 | |
| IPMI MAC address | 3C:EC:EF:11:11:11 | 3C:EC:EF:22:22:22 | 3C:EC:EF:33:33:33 |
| IPMI default Password | HM281S923A1 | HM281S923A2 | HM281S923A3 |
| IPMI Temp IP | 192.168.6.221 | 192.168.6.222 | 192.168.6.223 |
| IPMI Prod IP | 192.168.0.221 | 192.168.0.222 | 192.168.0.223 |
| Host | 192.168.6.111 | 192.168.6.112 | 192.168.6.113 |
| CVM | 192.168.6.121 | 192.168.6.122 | 192.168.6.121 |
| Cluster | 192.168.6.148 |
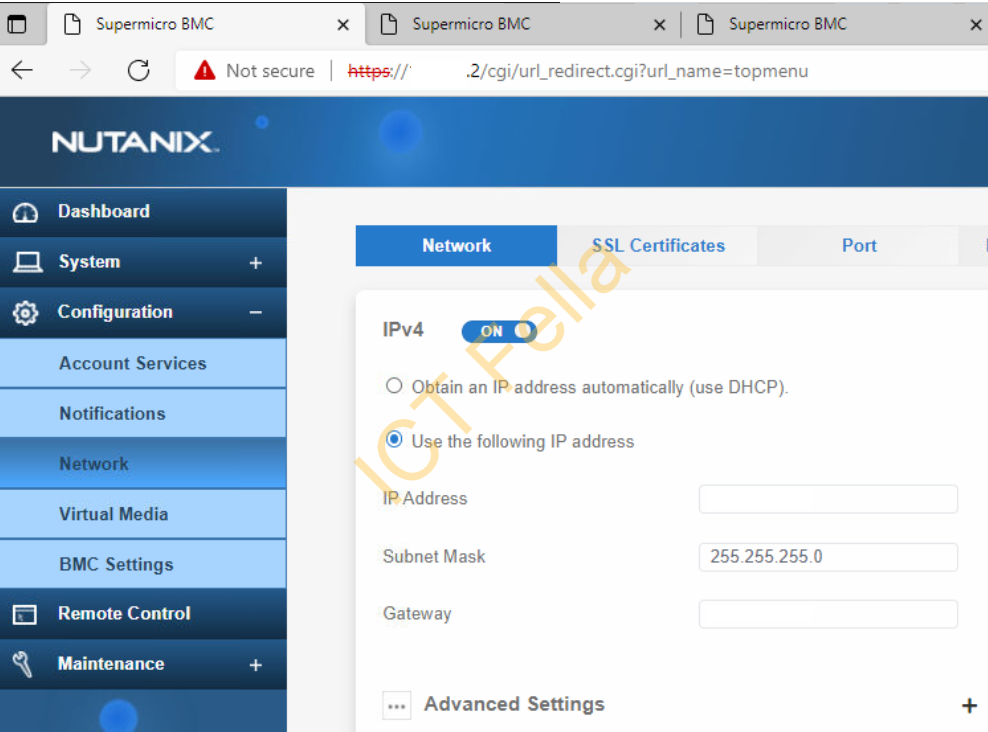
If you have a DHCP server configured within VLAN12, you will see IPMI is getting an IP address via DHCP, change the IP to the Temp IP as we will place all IPMI in a different VLAN/Subnet after imaging. Login via web browser and change the IP address to the temp IP address just for Imaging.
Imaging
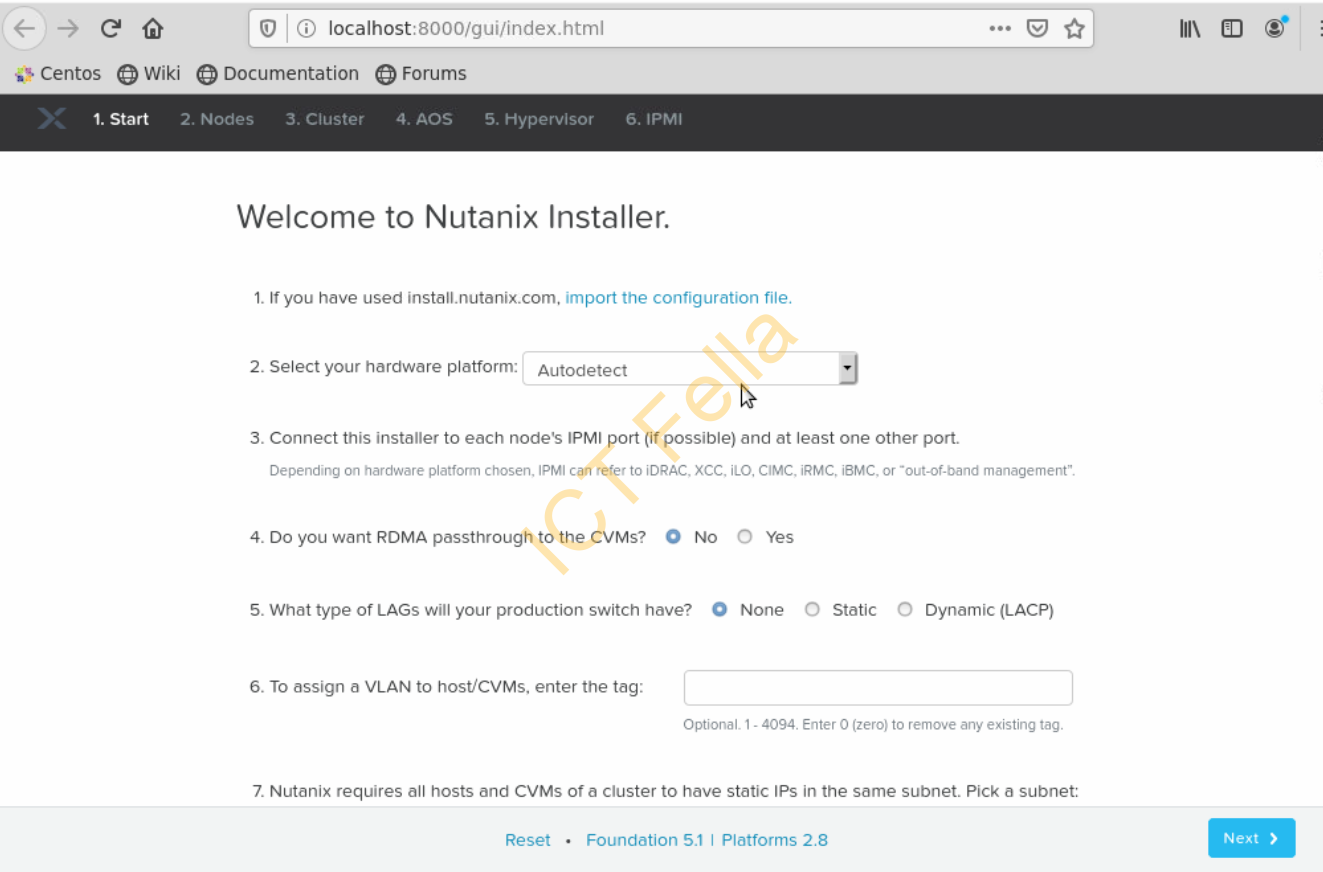
1. Double click on the imaging shortcut on the CentOS desktop and start the process, making sure the IP address and subnet mask match with the plan.
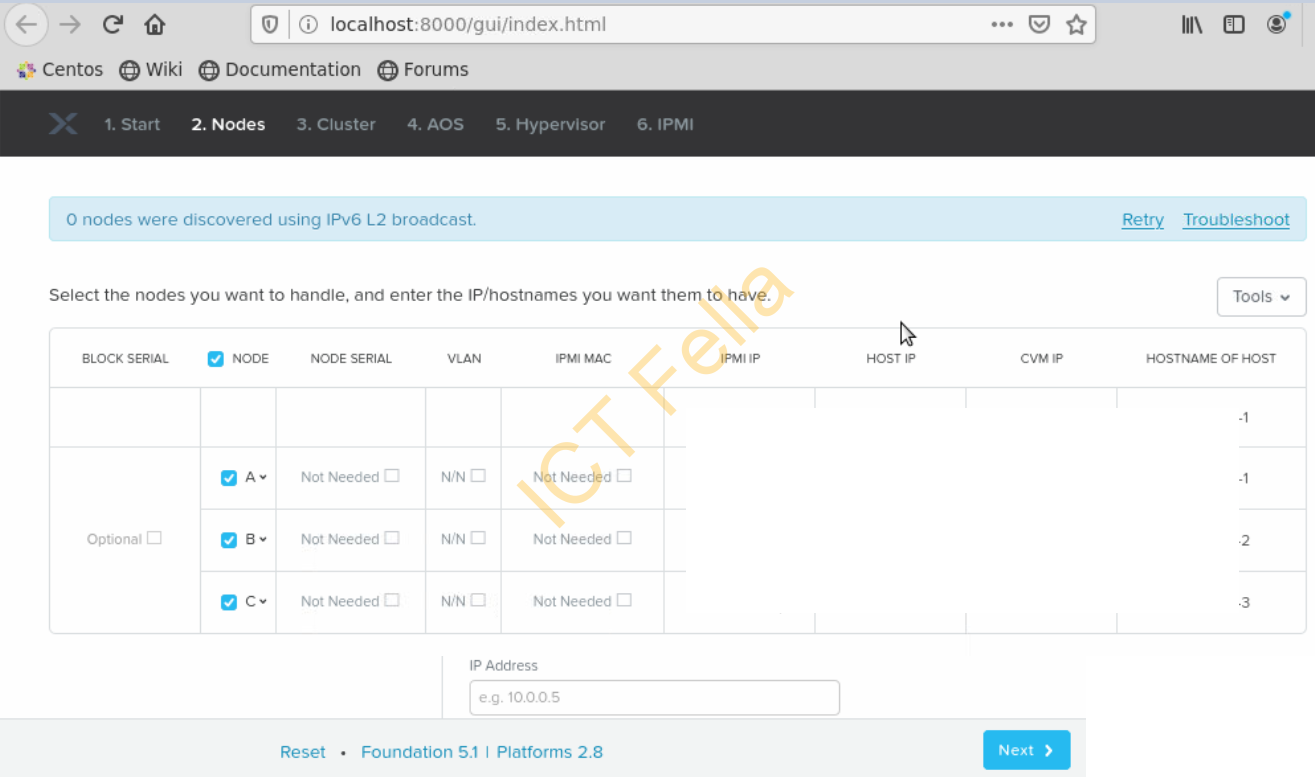
2. Since we are imaging 3x 1065 G8 nodes, we select 1 block with 3 nodes. 1 block means one 2RU chassis in Nutanix.
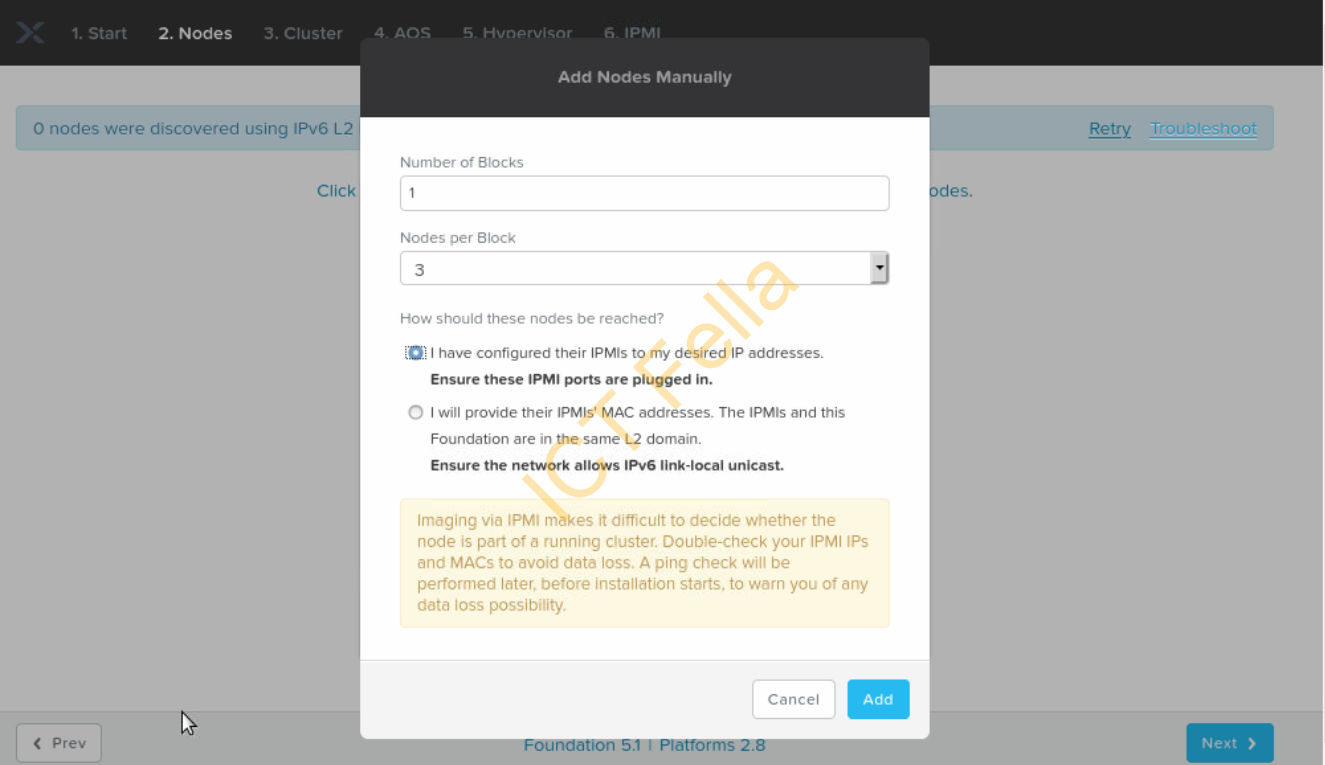
3. Foundation VM will use IPv6 link-local address to discover the nodes, sometimes you cannot see anything but you can use IPMI MAC address to manually define the nodes like below
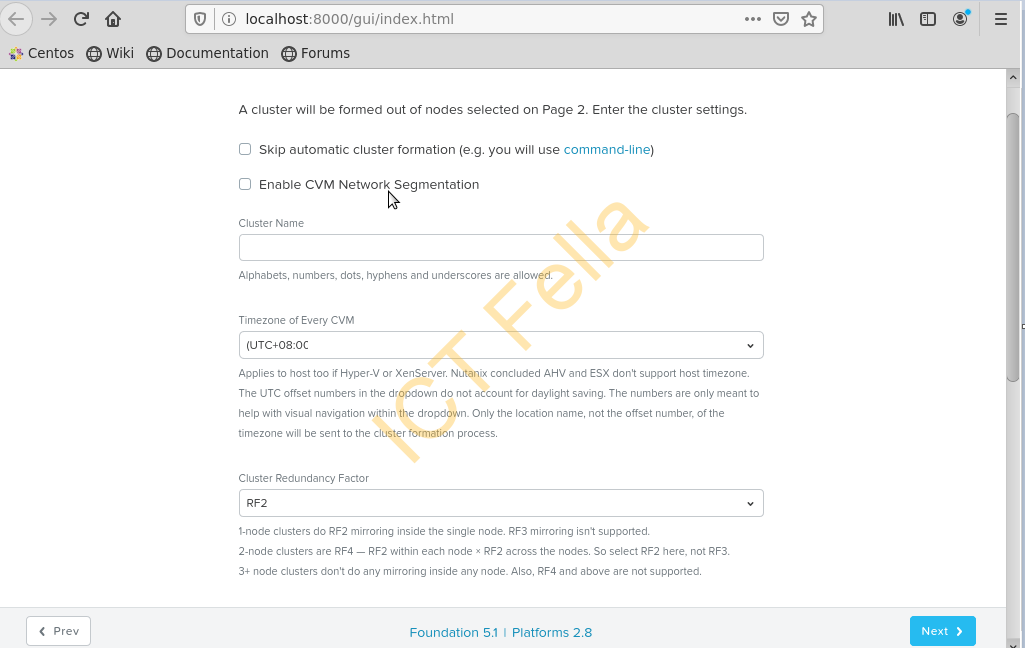
4. Give your cluster a name and configure your timezone and Cluster Redundancy Factor etc
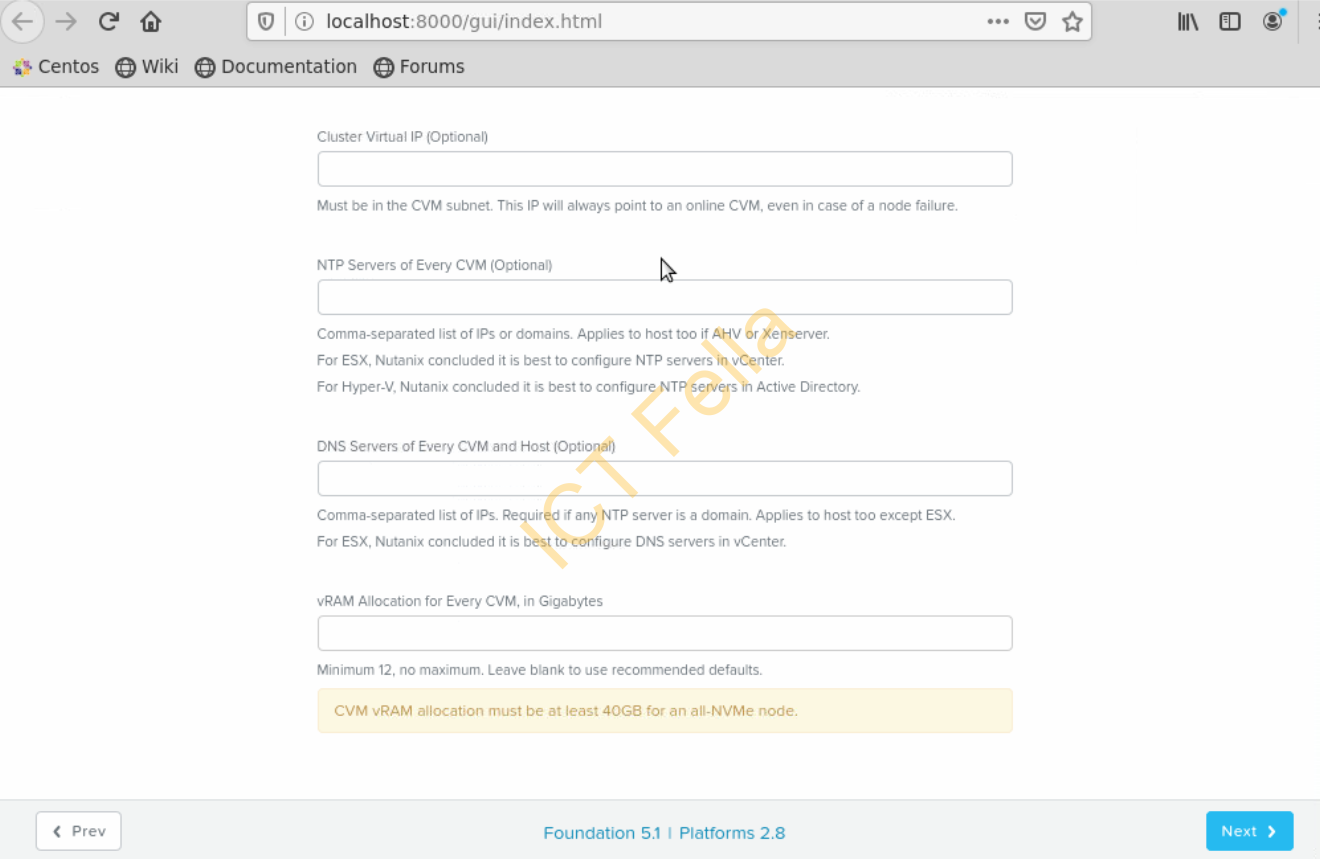
5. Setup your Cluster IP, NTP, DNS, CVM memory etc, you can leave it empty for now and configure it later
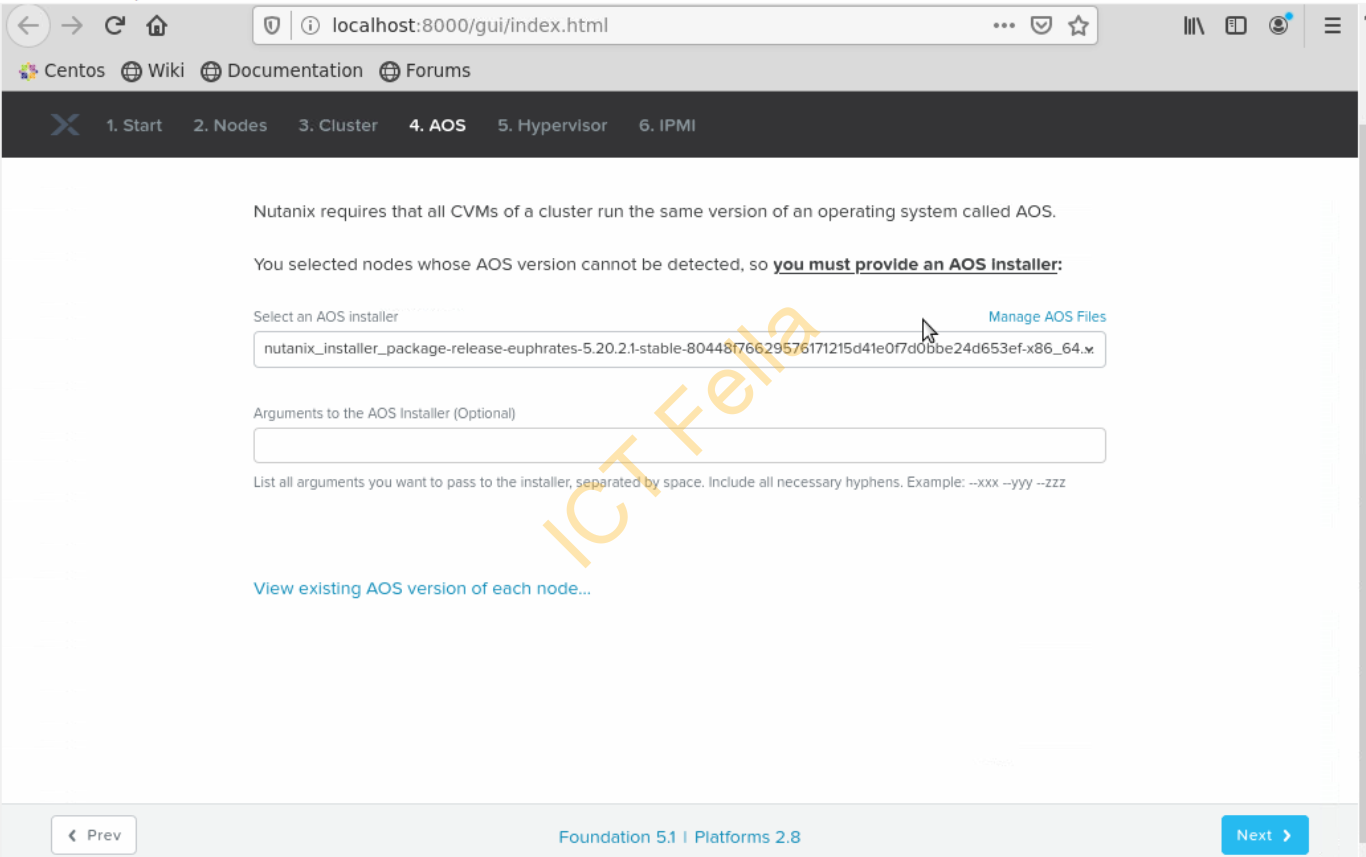
6. Select your NOS image, please be aware sometimes the NOS tarball file is sitting inside another tarball file, use “tar -xvf” command to extract it out
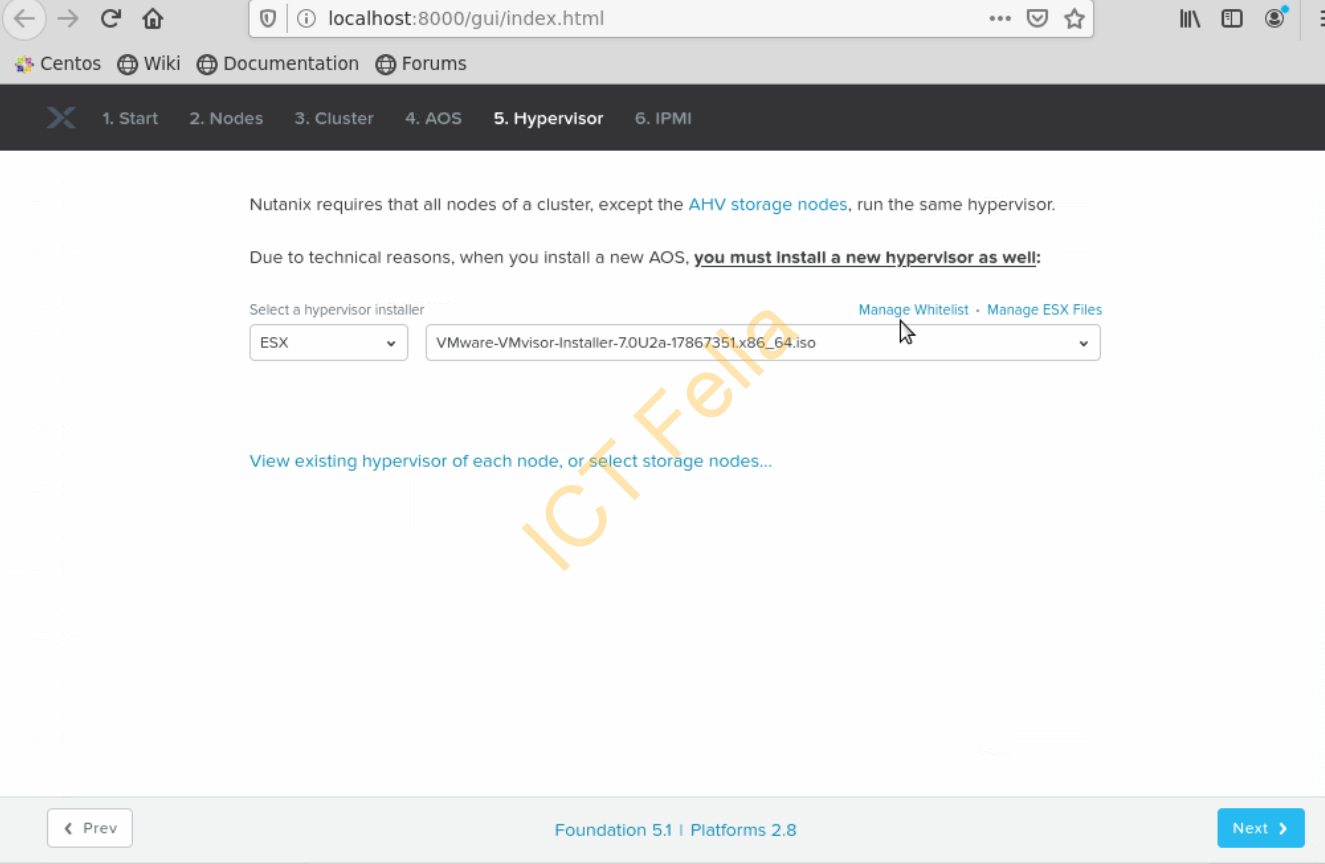
7. Select the ESXi ISO file
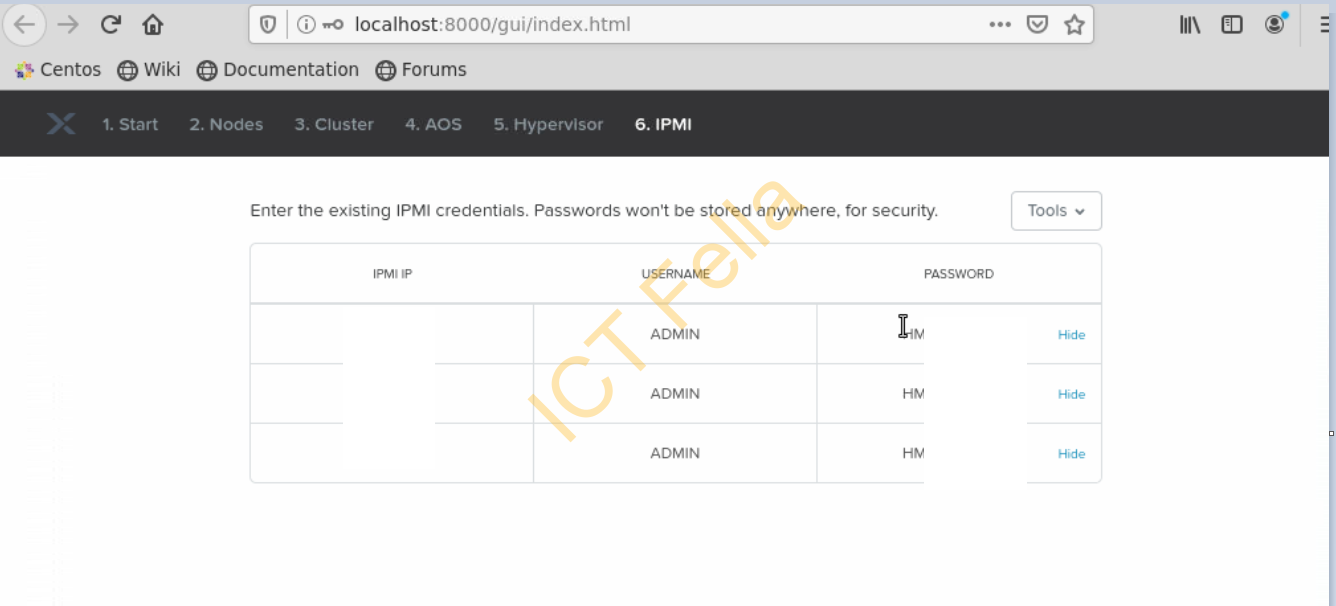
8. Manually input your IPMI address and Password
9. Start the process and click “Won’t sleep”

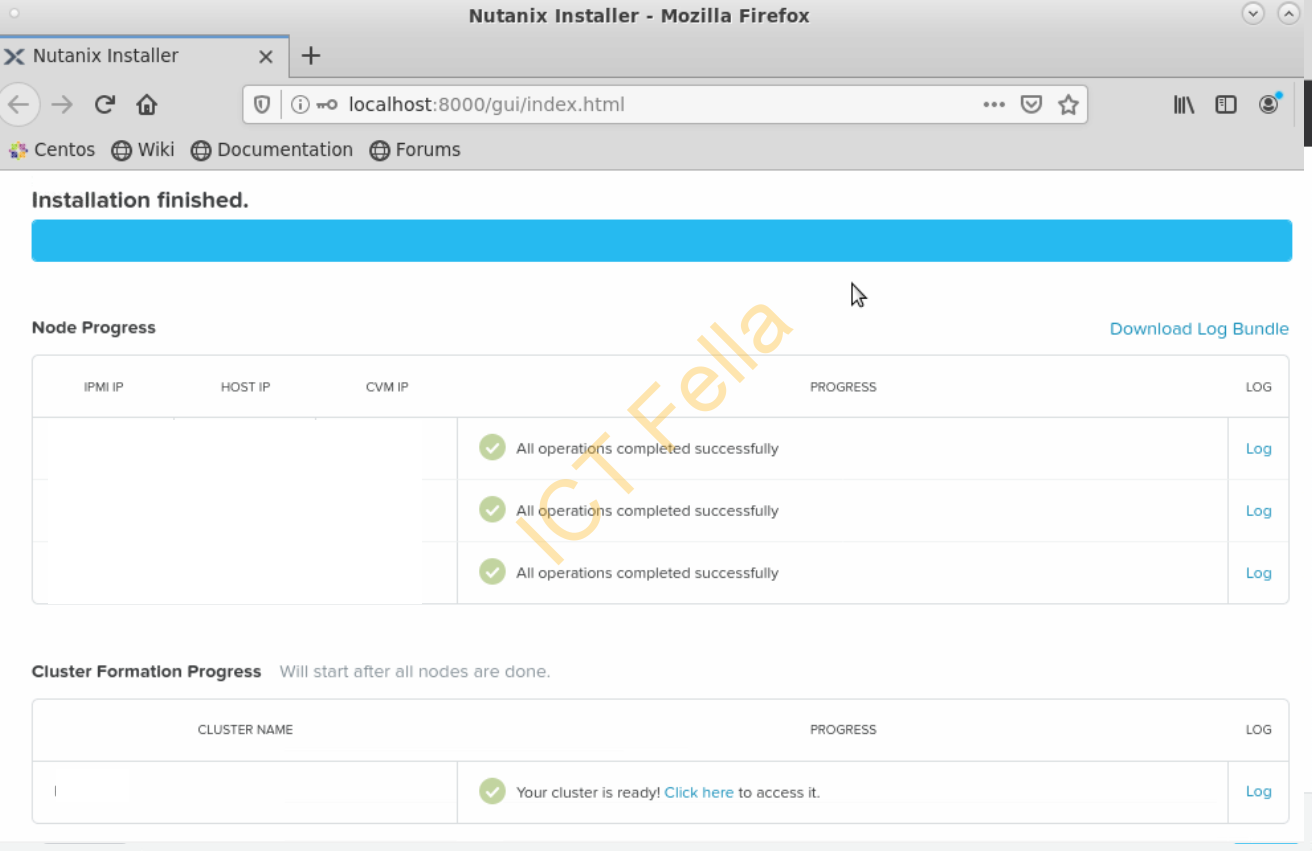
10. If everything goes well, the foundation build process will be complete after about 2 hours.