This post is about adding watermark on WordPress pictures and troubleshooting steps when the watermark is not applying
Steps
- Go to WordPress Dashboard, add new plugin, search “Easy Watermark”, install and activate it
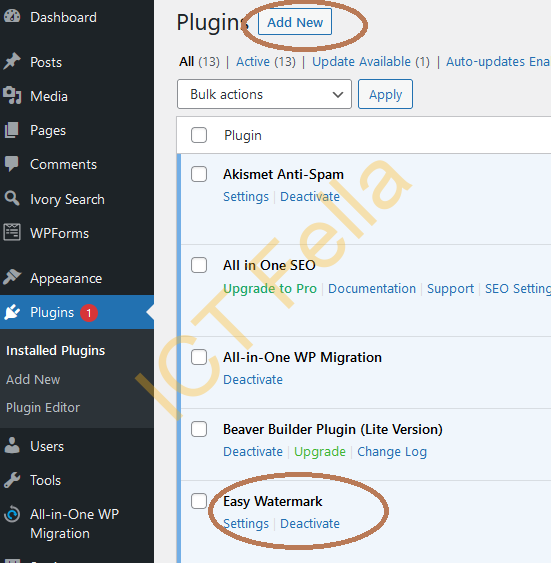
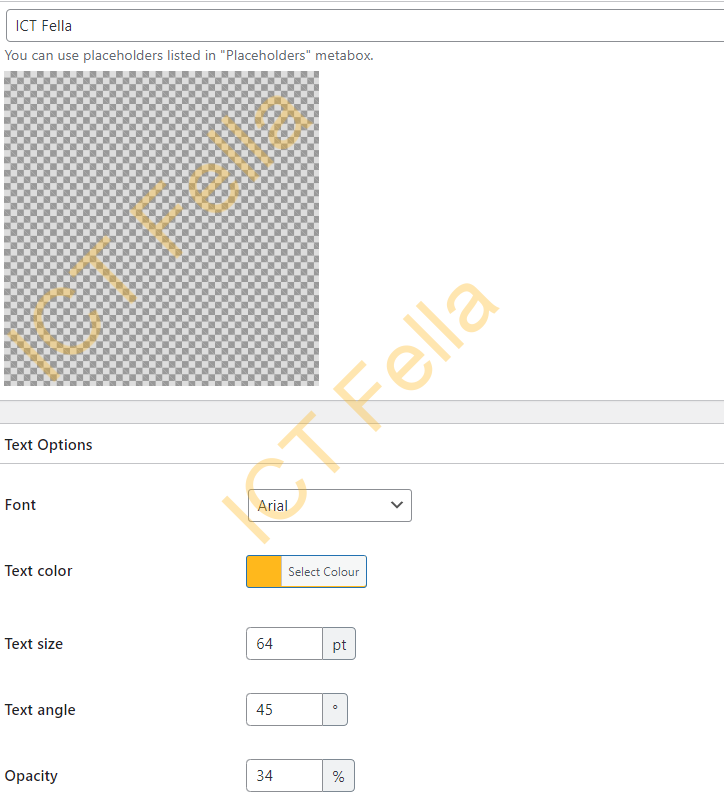
2. go to “settings” – “add New Watermark” – configure the options as you want, you then can preview the change, please be aware “Easy Watermark” is under “Tools” tab
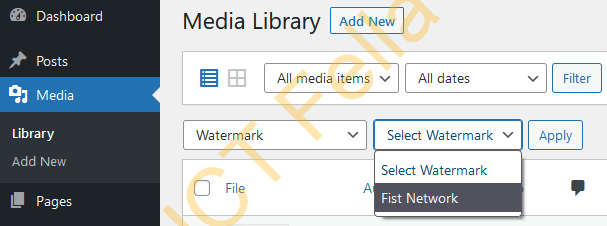
3. you then can go to your media library to “bulk select” multiple pictures then apply Watermark
4. flush the cache from the hosting company’s dashboard, using Hostinger as an example:

Troubleshooting
I have waited for a day, nothing changed, Tried the below options: put the whole site in maintenance mode, flush cache multiple times, open the page in private windows, force refresh the browser by using “Ctrl + F5”, none of them help…
Issue
Looking back at the WordPress dashboard and discovering that I have installed Jetpack and Jetpack has the ability to cache pictures, I then deactivated the plug completely, voila, watermark appeared in my pictures now.