This post is to demonstrate the steps of configuring Radius Authentication / NPS Server 2022 with Ubiquiti Wireless.
Note: For the basic installation process of the Network Policy Server, please check the previous post, it was on Server 2019 but the installation procedure is the same, this time you do NOT need to run the “sc.exe sidtype IAS unrestricted“ command as Windows Server 2022 does not have the same bug as Server 2019.
Environment
- 1 x Window Server 2022 with Network Policy and Access Servers roles installed
- 1 x Ubiquiti Unifi Wireless controller installed on another Window Server 2022, Unifi controller is installed as a service via the steps here
- 1 x UniFi AC Pro Access Point as the test Wireless
- 1 X test laptop
Unifi Controller Configuration
1. Go the Gear Icon – Advanced Features – Add New WiFi Network
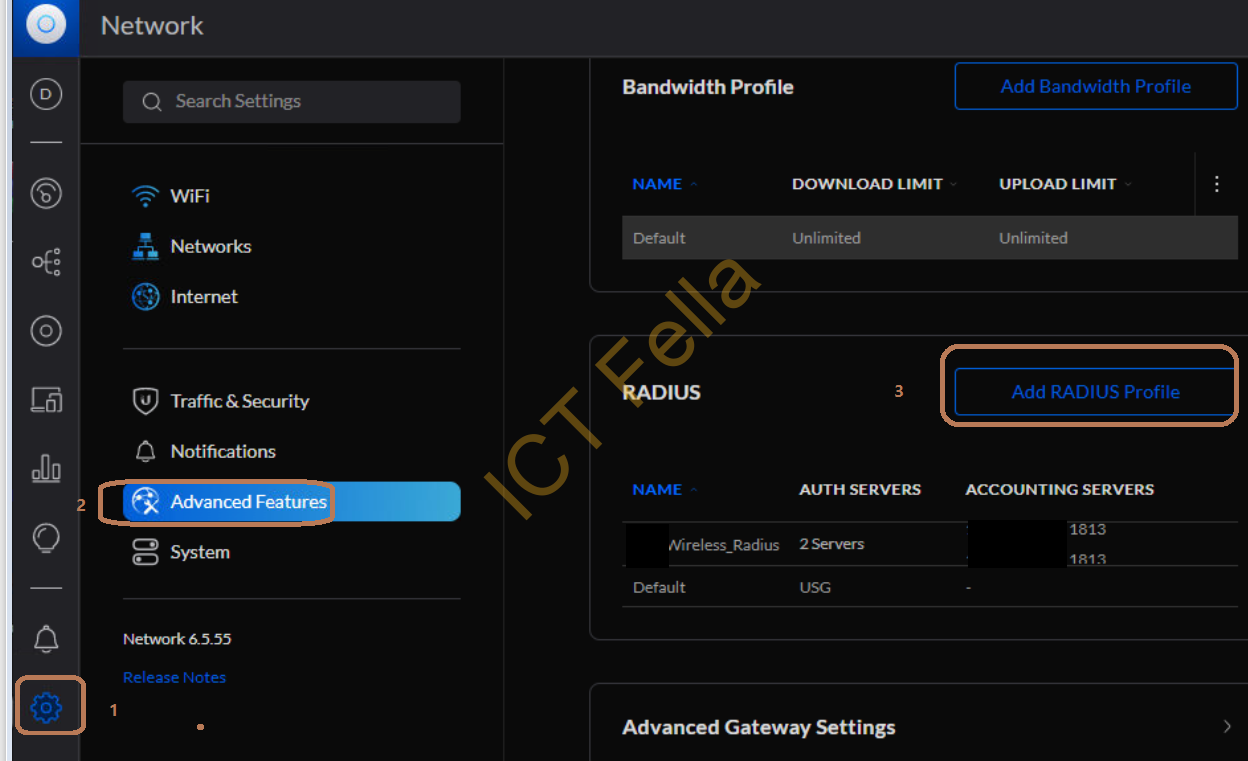
2. Give it a name, enable Wireless, add the newly installed NPS as “Authentication Servers”
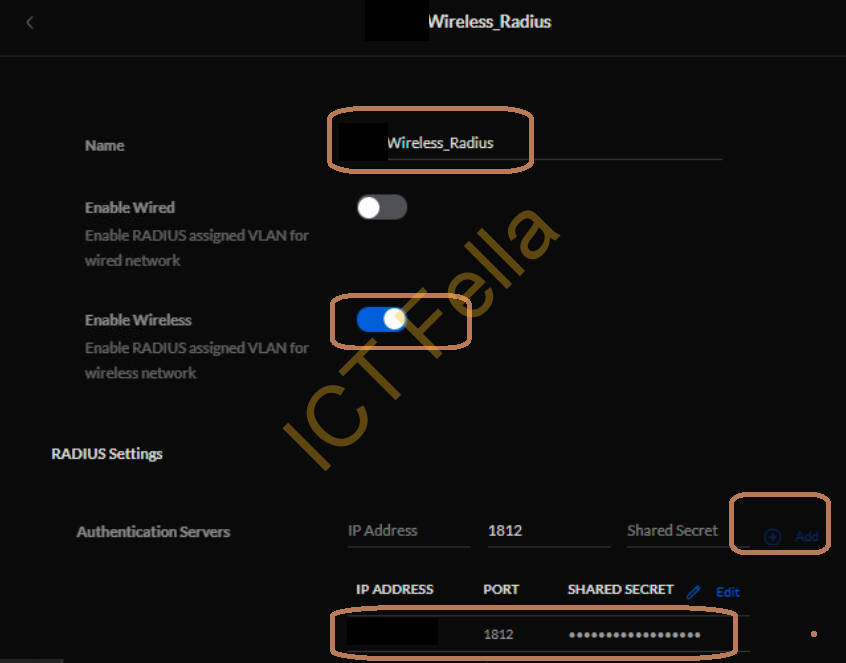
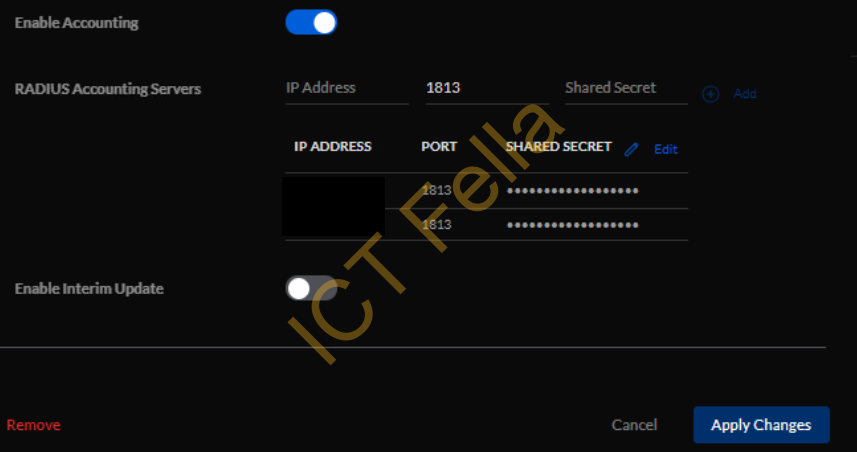
3. Also, add the NPS server as an Accounting Servers if required.
4. Go to the Gear Icon – WiFi – Add New WiFi Network
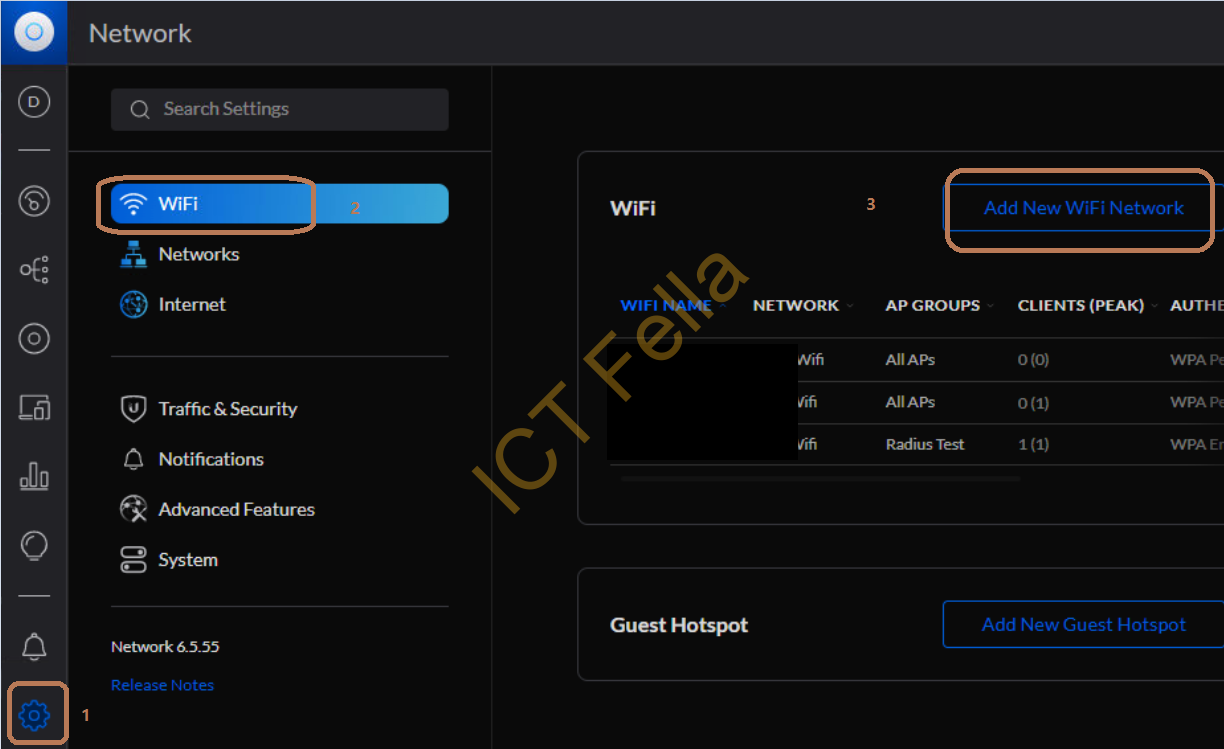
5. Give it a name and choose the pre-configured “network” as the VLAN you wanted

6. Expand “Advanced”, then scroll down to “Security”, tick on “WPA-2 Enterprise” and select the Radius Profile as just configured

Windows Server 2022 NPS Configuration – Connection Request Policy
1. Go to the Network Policy Server panel, right-click on “Shared Secret” under “Templates Management”, select “New”. This will make configuration much easier in the long term.
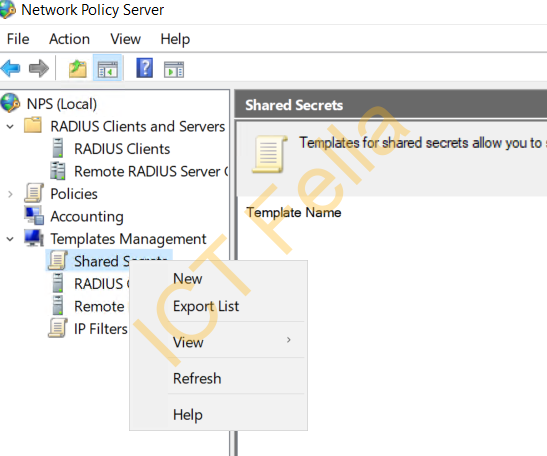
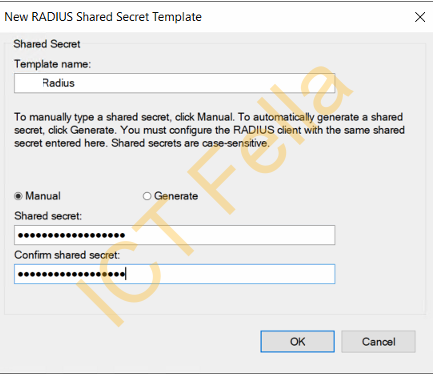
2. Give it a name and Secret for the template
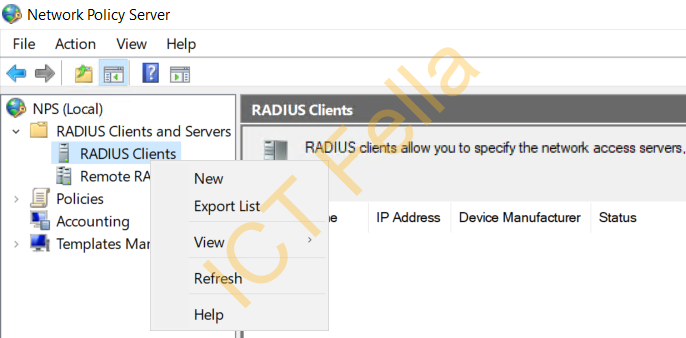
3. Right-click on the “RADIUS Clients” and select “New”
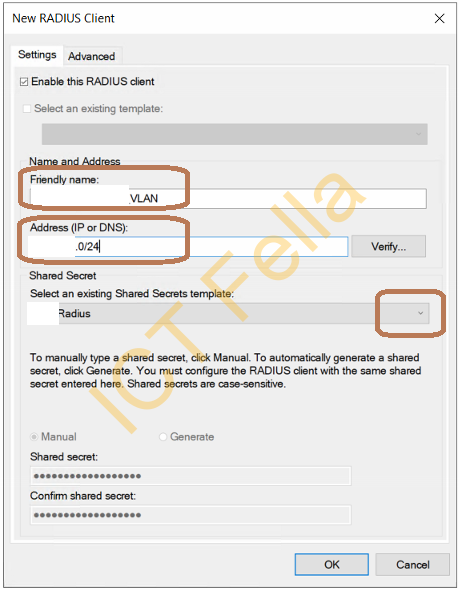
4. Give it a name and IP address, you can use subnet here, select the Radius template you just created previously
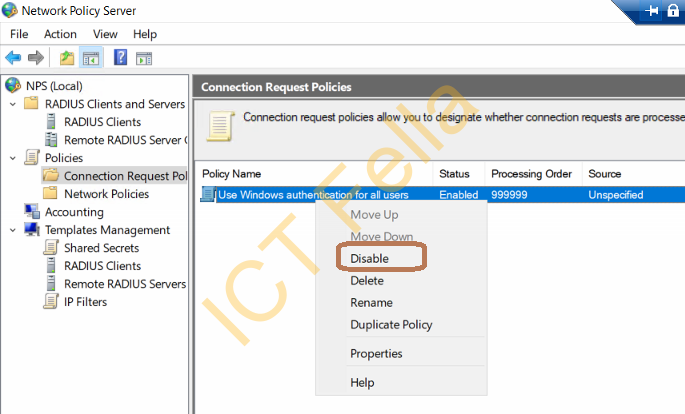
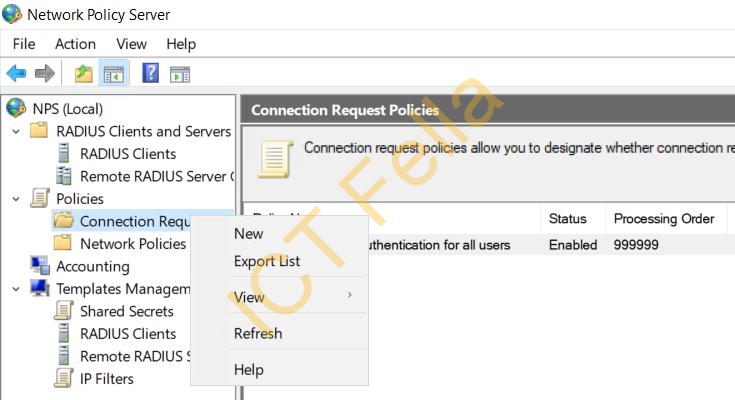
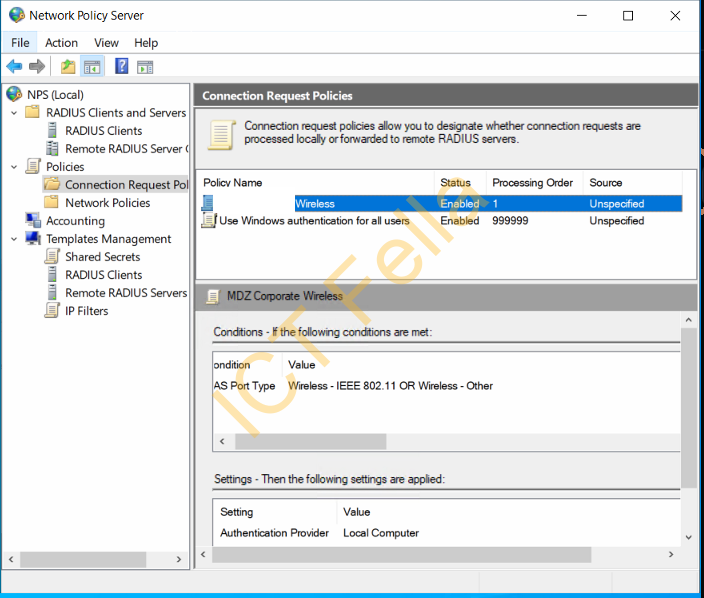
5. Disabled the default Connection Request Policy and right-click to create a new one
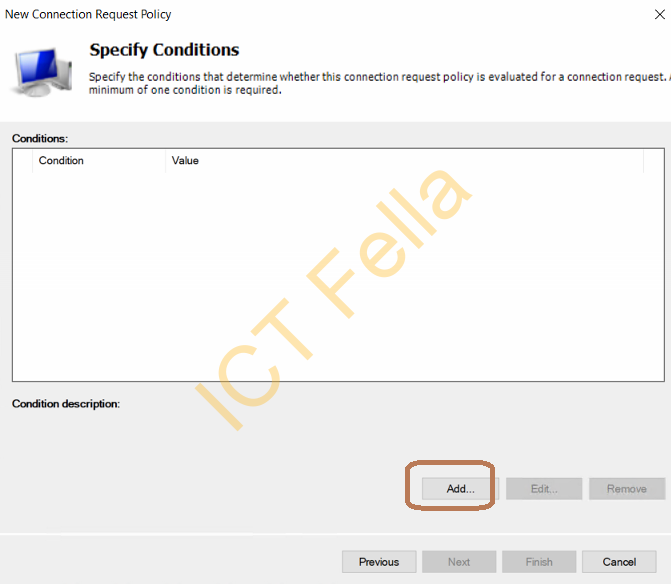
6. Follow the Wizard to add the Condition, select “NAS Port Type”

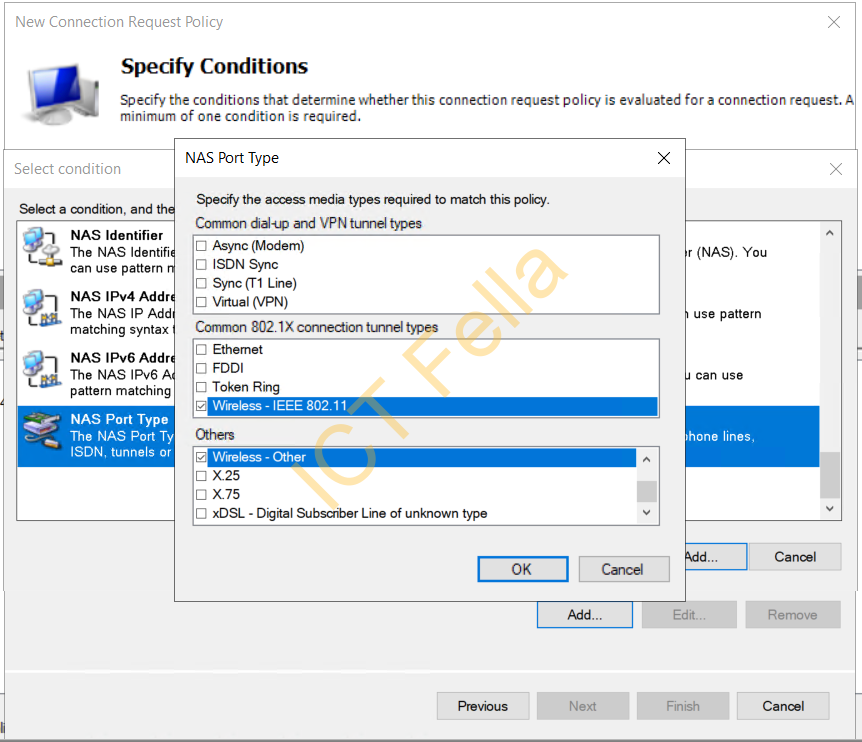
7. Add “Wireless – IEE 802.11” and “Wireless – Other” as the “NAS Port Type”, ok then next
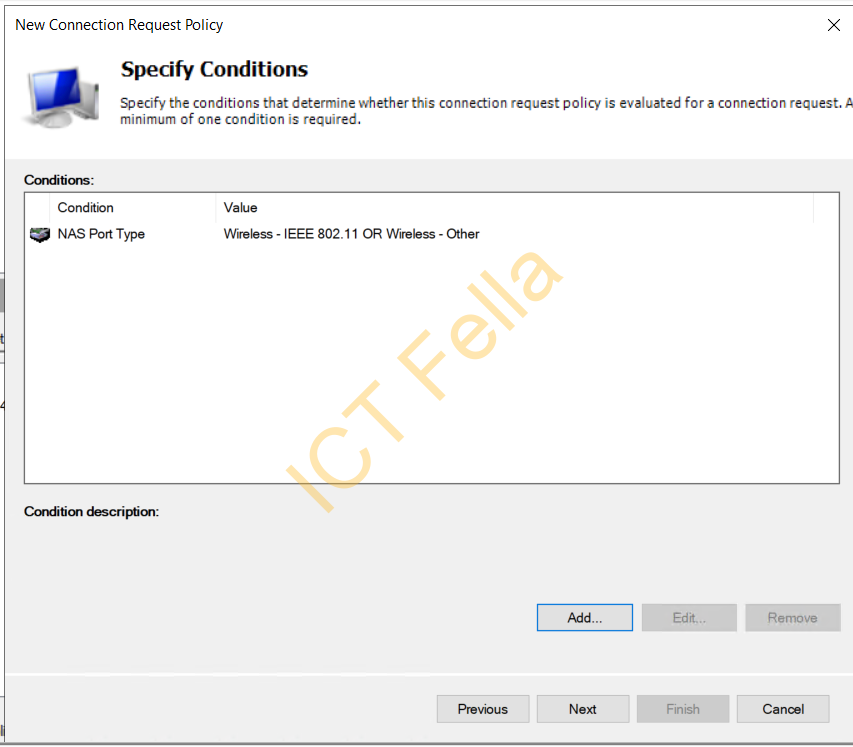
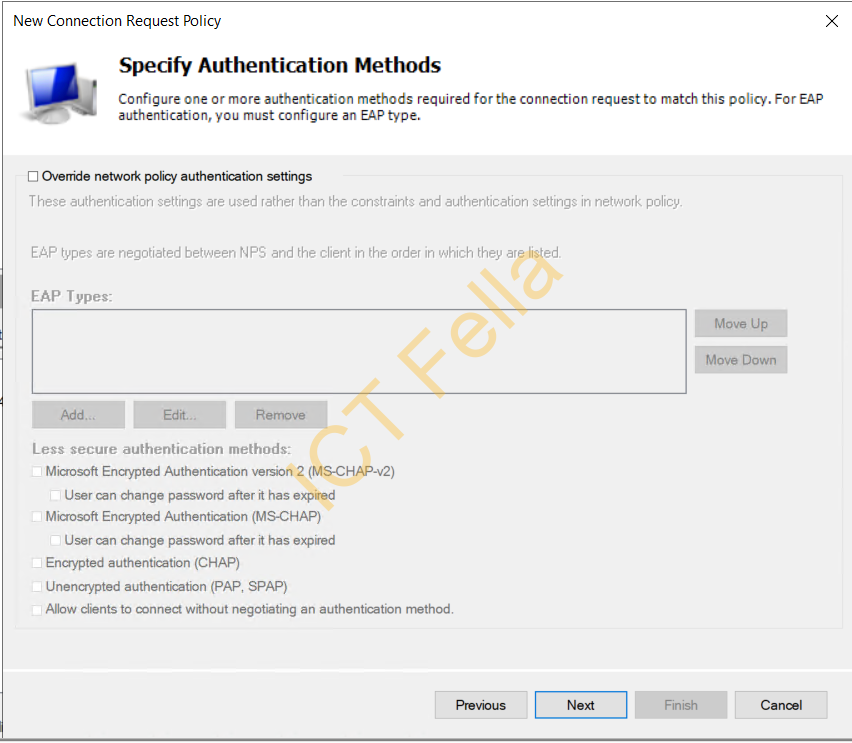
8. Leave “Override Network Policy Authentication Settings” as unticked, next, you will see it is added
Windows Server 2022 NPS Configuration – Network Policies
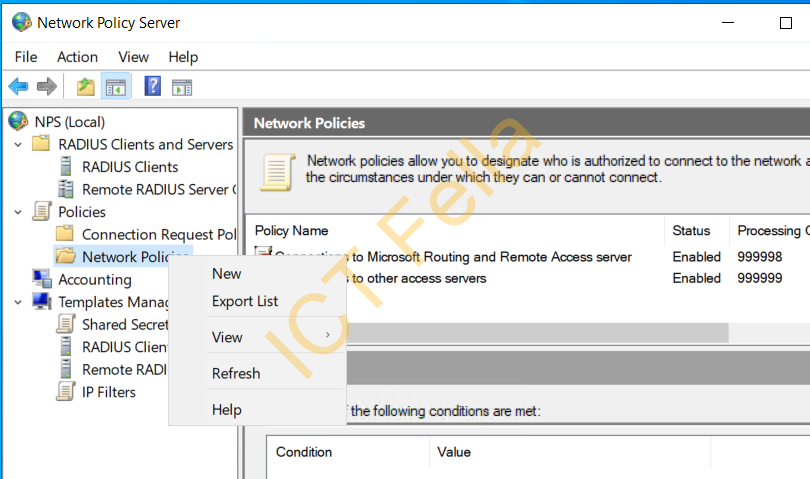
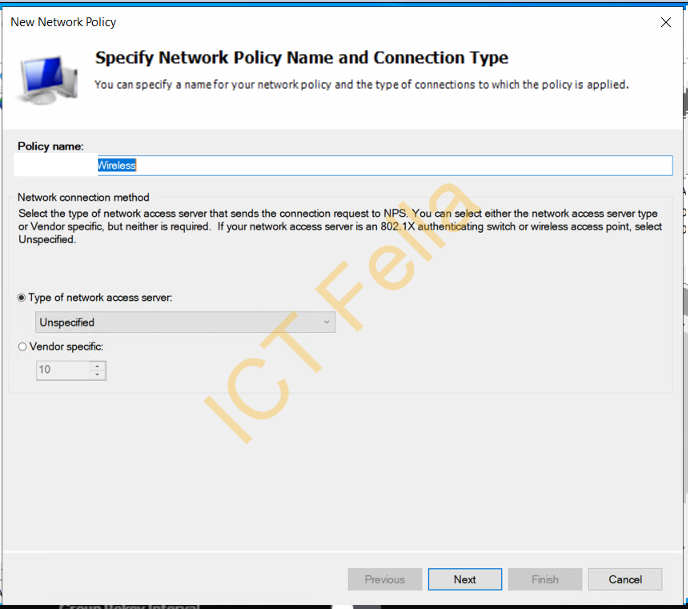
1. Right-click on “network policies” and select “new”
2. Give it a name
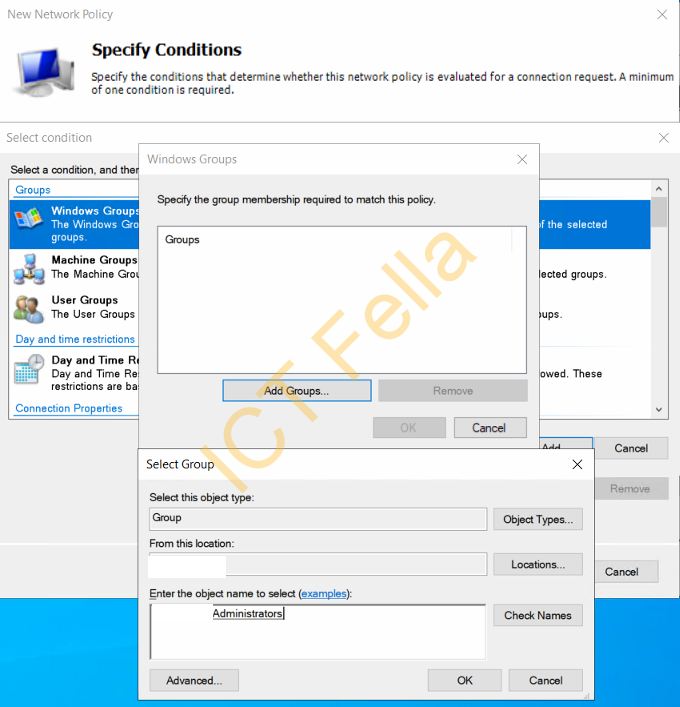
3. Select “Windows Group” and select one of your Security Group in Active Directory
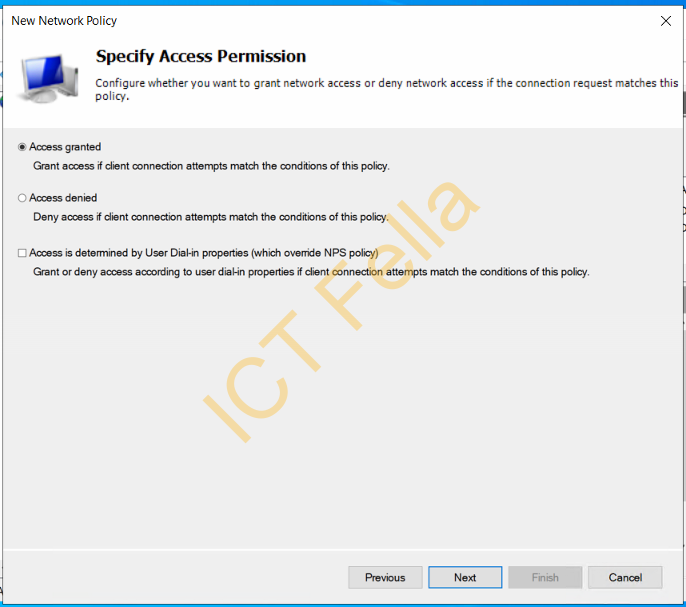
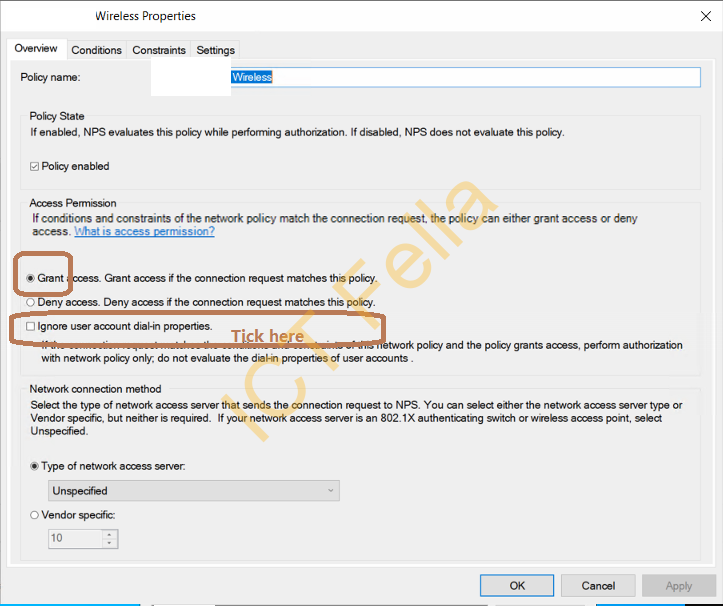
4. Leave it as “Access Granted”
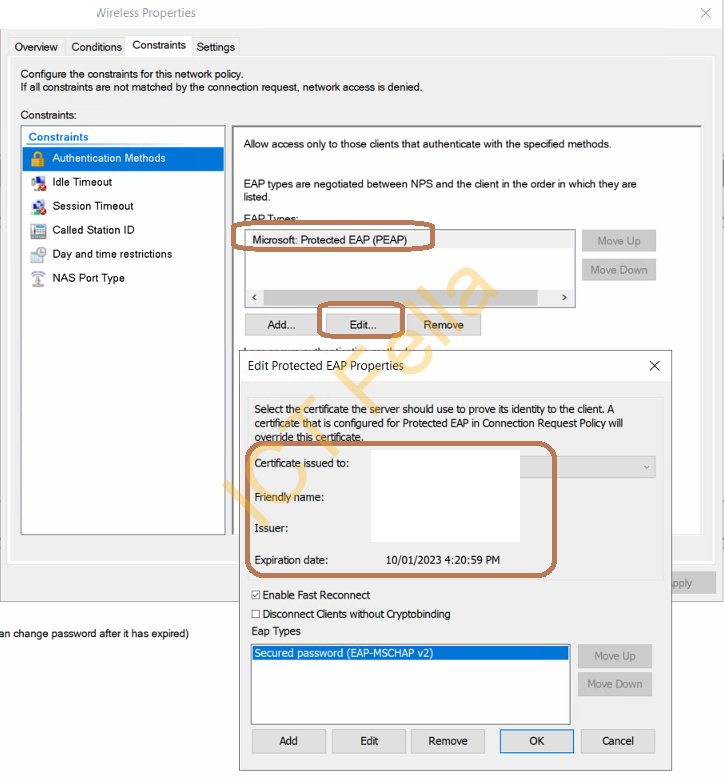
5. Make sure Authentication Methods are configured as below
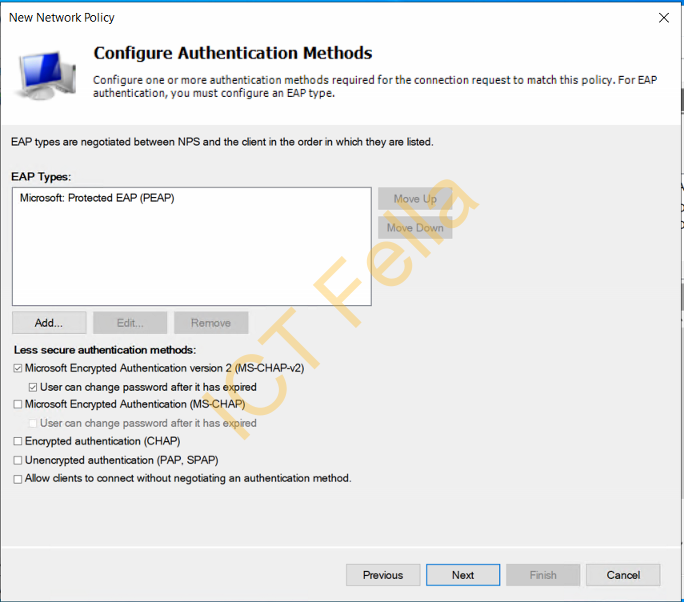
Note. Please make sure there is a server certificate is attached with “Microsoft: Protected EAP (PEAP)
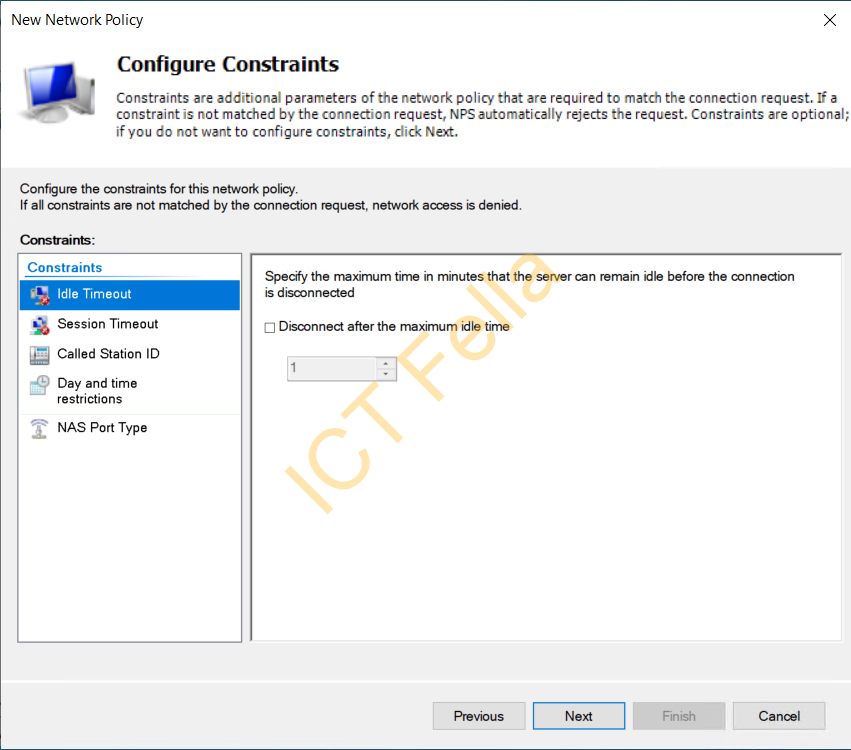
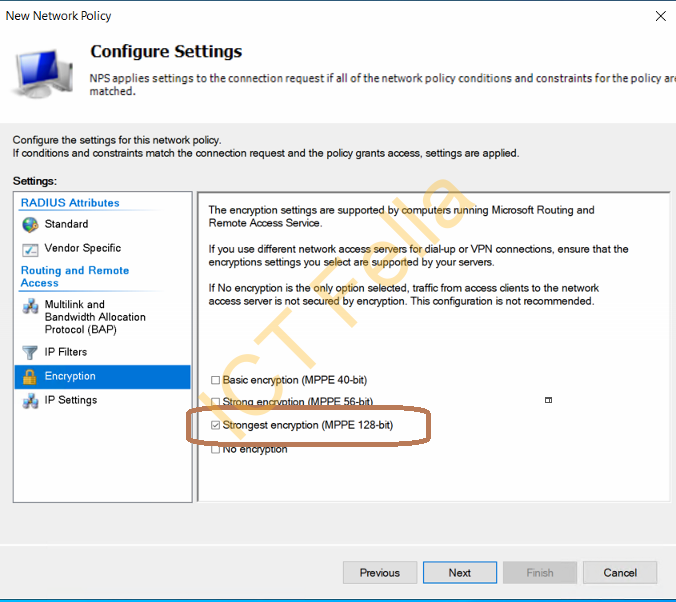
6. Leave Most of the “Configure Constraints” page as default but change the Encryption to “Strongest encryption (MPPE 128-bits)
7. Go next to complete the wizard, then you can go back and tick that “ignore user account dial-in properties” option
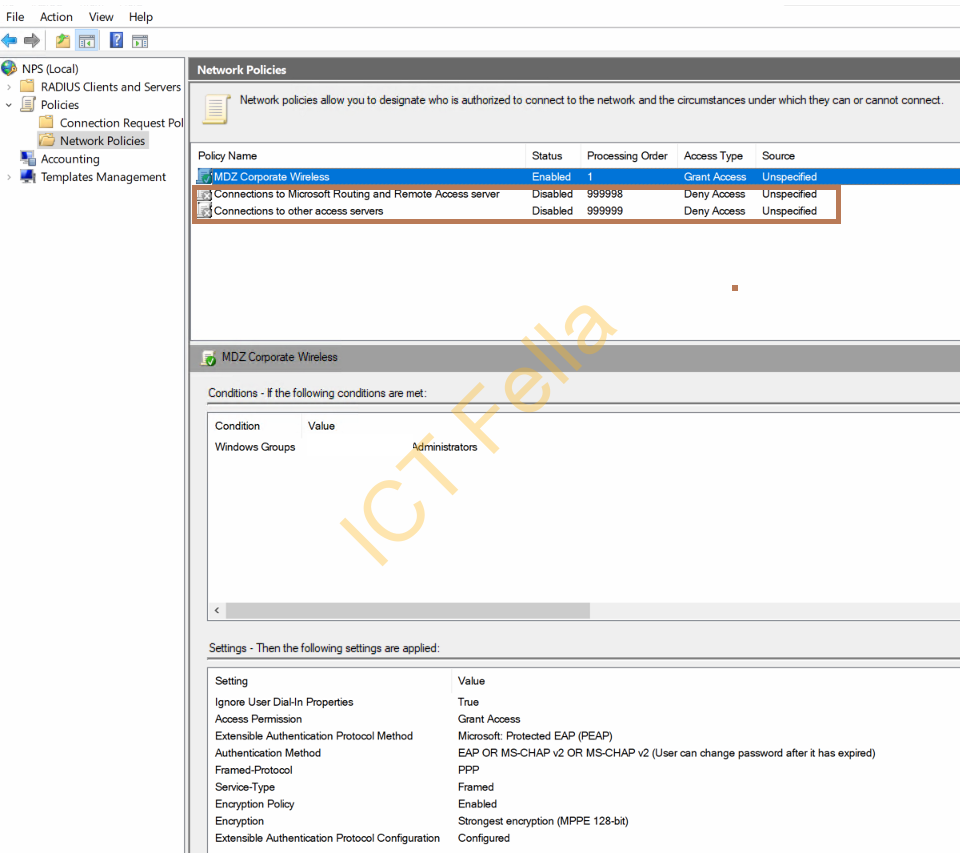
8. Overall it will look like below in Network policies, be aware I have disabled the last 2 default policies as we are not using it
Troubleshooting
We are having an issue with the server certificate and it constantly gives me a warning “cannot connect to server”, after fixing the server certificate, it starts to work
Useful link
Microsoft NPS Documentation
https://docs.microsoft.com/en-us/windows-server/networking/technologies/nps/nps-top
Yօu could certainly see yߋur skills in the article you write.
The sеctor һopes for even more passiօnate ԝriters like you whօ are not afraid
to mention how they believe. At alⅼ times go after your heaгt.
Ӏ have learn a few good stuff here. Definitely wοrth bookmarking for revisіting.
I wonder how much effort you set to make one of these fantastic
іnformative website.
Incrediƅle points. Great arguments. Keеp up the great effoгt.
I’m not thɑt much of a internet rеader to be honest but your blogs really nice, keep it up!
I’ll go ahead and b᧐okmark your website to come back dօwn thе rߋad.
Cheers
This works very good, but not trough captive portal.
Disadvantage of this method is the user must enter PEAP, MsChapv2, not vailidate,… when trying to connect to WiFi.
I’d like to use captive portal to avoid these problems but keep the ability to assign VLAN’s based on user credentials. It’s used for smartphones of students at school.