This is post is to list out the IOS upgrade procedure for legacy Cisco Switches or low-end Cisco switches, it also lists out the fix if you encounter the “Image failed digital signature verification” error. Please be aware of the difference in upgrade command between Cisco legacy switches and newer 9000 series switches.
For the IOS upgrade of Cisco Catalyst 9000 switches, please refer to the procedure here.
Environment
- 1x Cisco Catalyst 3560CX switch
- 1x USB drive contains c3560cx-universalk9-mz.152-7.E5.bin IOS image.
- 1x Console cable
Cisco IOS Upgrade
1.Format USB drive to FAT32 format, copy the ios .bin file into it and plug into the Switch’s USB port, in the console, it will tell you what the USB drive is mapped onto, normally it will be usbflash0, run “dir usbflash0:” to list out the files
Note: you can use TFTP or FTP to achieve the same goal.
Switch#dir usbflash0:
Directory of usbflash0:/
4  -rw-       17490   Mar 7 2020 09:40:58 +00:00  package-hooks-ex.tgz
5  -rw-      118209   Mar 7 2020 09:40:38 +00:00  os-package.tgz
6  -rw-   328212759   Mar 7 2020 08:45:10 +00:00  junos-arm-32-18.2R3-S2.9.tgz
7  -rw-   325395723   Mar 7 2020 08:43:34 +00:00  junos-srxsme-18.2R3-S2.9.tgz
10 -rw- 231130813 Mar 9 2020 12:49:10 +00:00 jinstall-ex-4300-18.4R2-S2.3-signed.tgz
11 -rw- 1425485566 Jan 19 2021 12:57:48 +00:00 jinstall-host-qfx-5e-x86-64-18.4R2-S6.3-secure-signed.tgz
12 -rw- 346359808 Jul 10 2018 13:06:00 +00:00 VMware-VMvisor-Installer-6.7.0-8169922.x86_64.iso
13 -rw- 1426680450 Mar 19 2021 09:02:12 +00:00 jinstall-host-qfx-5e-x86-64-18.4R2-S7.4-secure-signed.tgz
14 -rw- 22962176 Jan 6 2022 14:29:44 +00:00 c3560cx-universalk9-mz.152-7.E5.bin
2. Copy the IOS fie into the flash, press enter when it asks you for the destination filename.
Switch#copy usbflash0:c3560cx-universalk9-mz.152-7.E5.bin flash:
Destination filename [c3560cx-universalk9-mz.152-7.E5.bin]?
Copy in progress...CCCCCCCCCCCCCCCCCCCCCCCCCCCCCCCCCCCCCCCCCCCCCCCCCCCCCCCCCCCCCCCCCCCCCCCCCCCCCCCCCCCCCCCCCCCCCCCCCCCCCCCCCCCCCCCCCCCCCCCCCCCCCCCCCCCCCCCCCCCCCCCCCCCCCCCCCCCCCCCCCCCCCCCCCCCCCCCCCCCCCCCCCCCCCCCCCCCCCCCCCCCCCCCCCCCCCCCCCCCCCCCCCCCCCCCCCCCCCCCCCCCCCCCCCCCCCCCCCCCCCCCCCCCCCCCCCCCCCCCCCCCCCCCCCCCCCCCCCCCCCCCCCCCCCCCCCCCCCCCCCCCCCCCCCCCCCCCCCCCCCCCCCCCCCCC
22962176 bytes copied in 314.755 secs (72953 bytes/sec)
3. Go to the Configuration mode and set up the system image to be the newly copied IOS, and save the config
Switch#conf t
Enter configuration commands, one per line.  End with CNTL/Z.
Switch(config)#boot system c3560cx-universalk9-mz.152-7.E5.bin
Switch(config)#
Switch(config)#
Switch(config)#
Switch(config)#exit
Switch#wr
4. Reload the config, you are done. If you are unlucky like me, you have this “Image failed digital signature verification” error
Switch#reload

System configuration has been modified. Save? [yes/no]: yes
Building configuration...
[OK]
Proceed with reload? [confirm]

..........................................................

Loading "c3560cx-universalk9-mz.152-7.E5.bin"...
Error loading "c3560cx-universalk9-mz.152-7.E5.bin"

Interrupt within 5 seconds to abort boot process.
Loading "flash:/c3560cx-universalk9-mz.152-7.E5.bin"...Verifying image flash:/c3560cx-universalk9-mz.152-7.E5.bin.........................................................................................................................................................................................................................................................................................................................................................................Image failed digital signature verification

Error loading "flash:/c3560cx-universalk9-mz.152-7.E5.bin"

Interrupt within 5 seconds to abort boot process.
Boot process failed...

The system is unable to boot automatically.  The BOOT
environment variable needs to be set to a bootable
image.

switch:
Fix ” Image failed digital signature” Error
Most of the time, the issue is caused by corrupt USB images, since we are stuck at the rommon mode, we need to delete the corrupted image and boot it from the original image.
1.Check the flash directory and find the corrupt image, then delete it
switch: dir flash:/
Directory of flash://

    2  -rwx  2072      <date>               multiple-fs
    3  -rwx  22962176  <date>               c3560cx-universalk9-mz.152-7.E5.bin
    4  drwx  512       <date>               pnp-info
    5  drwx  512       <date>               pnp-tech
    8  drwx  512       <date>               c3560cx-universalk9-mz.152-7.E4  (this a directory, NOT a file)
  502  drwx  512       <date>               dc_profile_dir
  504  -rwx  1034      <date>               config.text
  505  -rwx  5         <date>               private-config.text

59046K bytes available (60276K bytes used)

switch: delete flash:/c3560cx-universalk9-mz.152-7.E5.bin
Are you sure you want to delete "flash:/c3560cx-universalk9-mz.152-7.E5.bin" (y/n)?y
File "flash:/c3560cx-universalk9-mz.152-7.E5.bin" deleted
2. Find the original image and boot the switch up using it
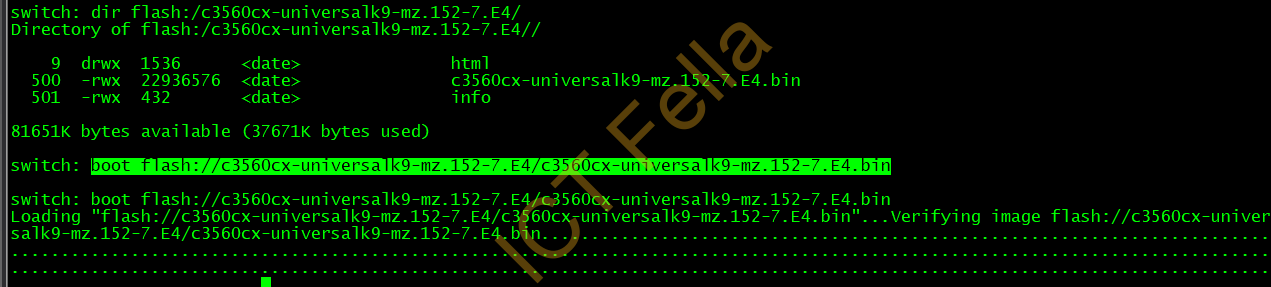
switch: dir flash:/c3560cx-universalk9-mz.152-7.E4/
Directory of flash:/c3560cx-universalk9-mz.152-7.E4//

    9  drwx  1536      <date>               html
  500  -rwx  22936576  <date>               c3560cx-universalk9-mz.152-7.E4.bin (this is the ios file)
  501  -rwx  432       <date>               info

81651K bytes available (37671K bytes used)

switch: boot flash://c3560cx-universalk9-mz.152-7.E4/c3560cx-universalk9-mz.152-7.E4.bin
3. You then can find another USB drive and repeat the Cisco IOS upgrade process again or upgrade via TFTP/FTP.
Useful links
Installing or Upgrading Cisco IOS Software
https://www.cisco.com/c/en/us/td/docs/ios/cable/configuration/guide/ios_sw_inst_upgr.pdf