Object
This serial of posts is to demonstrate the Nutanix VMware Cluster Field Installation process with step-by-step procedures. Part 1 is for Foundation VM and network preparation before the imaging process. Nutanix is the industrial leader in the HCI field, its unique infrastructure combined the compute and storage together, its hardware & software can work with VMware, Hyper-V, and AHV clusters, however, the majority of the customers are using VMware ESXi because of its wide vendor support.
This post assumes you have a basic understanding of Nutanix and VMware cluster infrastructure such as CVM, storage container, virtual switch, port group, HA and DRS, etc. For Foundation Field installation, you can use Windows Java Applet, MacOS Java Applet, or Foundation VM (CentOS VM) with VLAN preconfigured, etc, but this serial of the posts is focused on the most reliable way based on previous experiences as there are so many factors can causing issues during the imaging process.
You can go on https://my.nutanix.com and download the most recent Field Installation Guide for more options.
Environment
- 3x Nutanix Nodes with SuperMicro Hardware
- 1x Cisco switch with flat network configured: only one VLAN 12 and all ports are on Access Mode, allowed VLAN 12 and Portfast enabled.
- 1x Laptop with SSD hard disk, 1 x onboard Ethernet Port (RJ45, please do NOT use USB adapter), Windows 10 Operating System
- 3x IPMI cables connected on the Imaging Switch.
- 3x 1G ethernet cables connected on the Imaging Switch.
VirtualBox preparation
- Download and install the VirutalBox software from https://www.virtualbox.org/wiki/Downloads
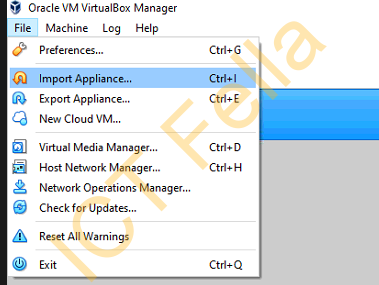
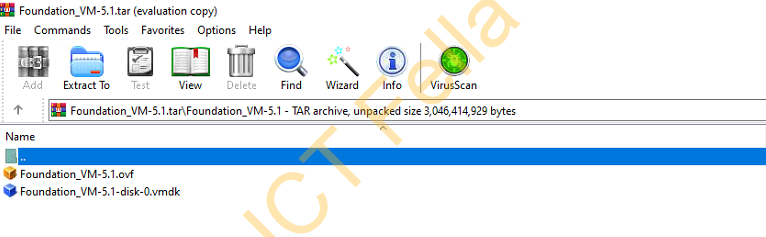
- Download the latest Foundation VM, go to VirtualBox – File – Import Appliance and follow the wizard and import the Foundation_VM-5.x.ovf file
- Once imported, right click on the VM – Settings – Network, please make sure your laptop is connected to the imaging switch and the network adapter is on “Bridged” mode and the correct onboard NIC/Ethernet selected (NOT the wireless), this is to make sure the Foundation VM can communicate with the Nodes via the bridged NIC thoughout the imaging process.

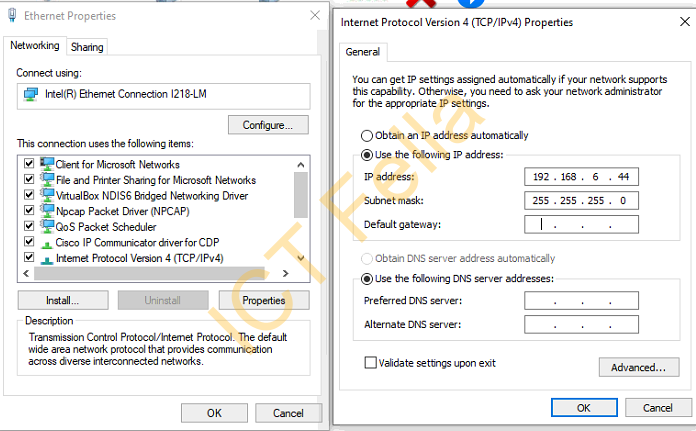
- Configure a static IP on the onboard NIC, you don’t need a Default Gateway as we will put ESXi host, CVM and IPMI in the same VLAN/subnet initially, then reconfigure the IPMI IPs later.
- Disable the local windows firewall temporarily to avoid any funny communication issues
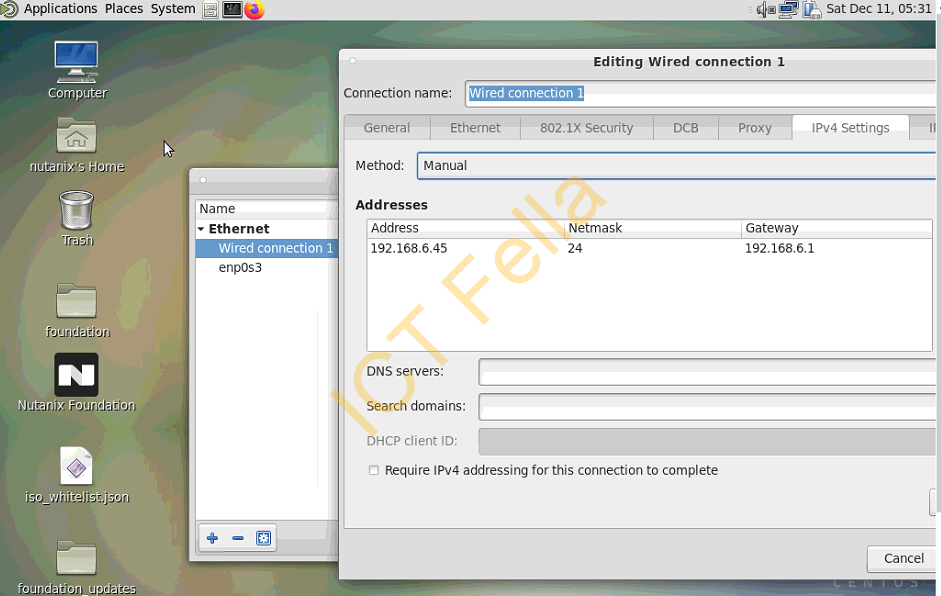
- Start up the Foundation VM, you can see it is CentOS 7 – right click on the connections icon and select “Edit Connections”

- Select the “Wired connection 1” – “IPv4 Settings”, configure an IP address that in the same netowrk of the laptop and ESXi host, CVMs, IPMI, etc.
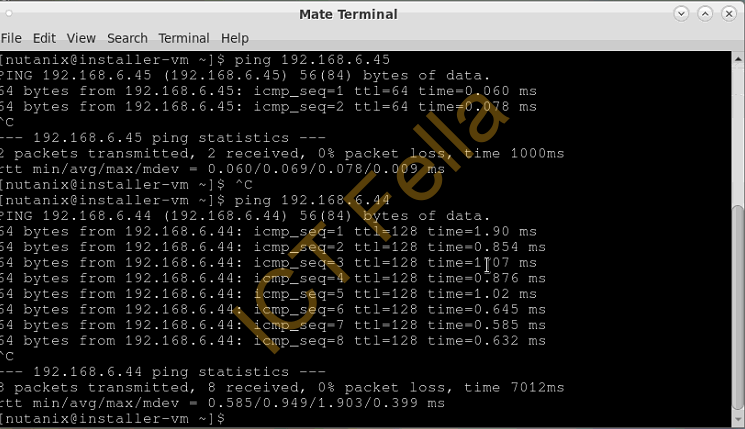
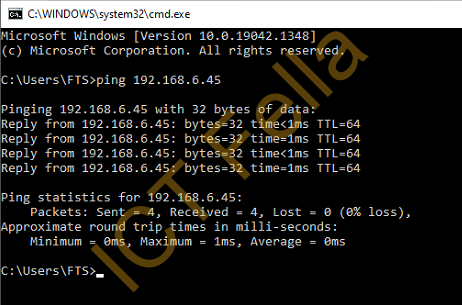
- Verify the connectivity between the Foundation VM and Imaging laptop and make sure you can commucniate properly.
Useful links
Nutanix Field Installtion Guide
Foundation 5.1.x – Field Installation Guide (nutanix.com)