This post is to document the process of migrating VMware Standard Switch to Distributed Switch. The purpose of this change is to enable LACP on both VMware Hosts and Core/Top of Rack Switch.
Environment
Three-node cluster connected to Two-Switch stack with redundant connection for each switch
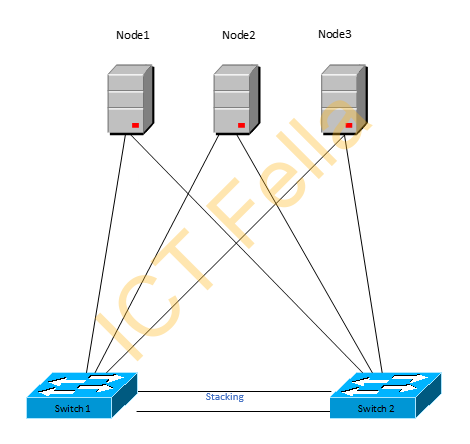
On each switch port, it is configured with standard Trunk Port with all the VLAN allowed, the below is a current config for Juniper Switches
set interfaces xe-0/0/1 description ICT_ESXi
set interfaces xe-0/0/1 unit 0 family ethernet-switching interface-mode trunk
set interfaces xe-0/0/1 unit 0 family ethernet-switching vlan members default
set interfaces xe-0/0/1 unit 0 family ethernet-switching vlan members all
set interfaces xe-0/0/1 unit 0 family ethernet-switching storm-control default
Preparation
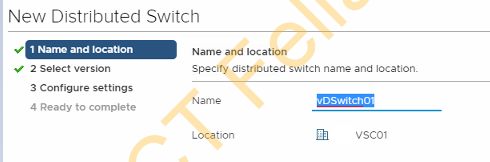
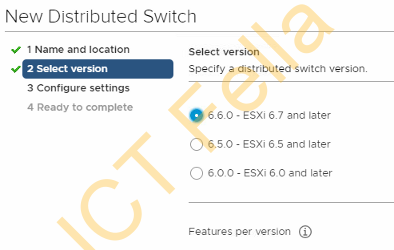
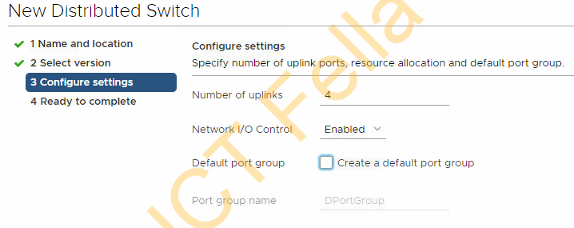
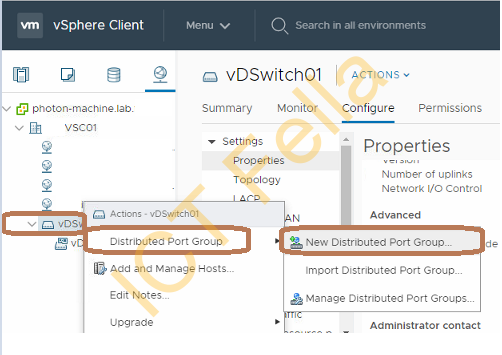
New Distributes Virtual Switch is created without any uplinks, there is no impact in production VMs.
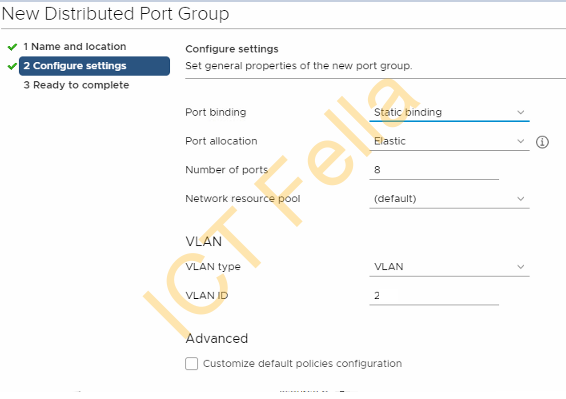
New Port Groups are created under the newly created virtual distributed switch. Again this part has no impact in production VMs
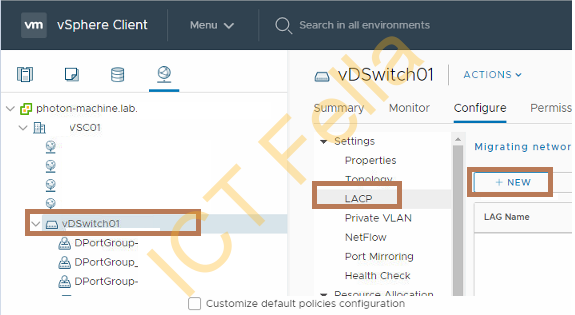
Create new LAG port
Here we are using passive mode as on the switch side we are on active mode
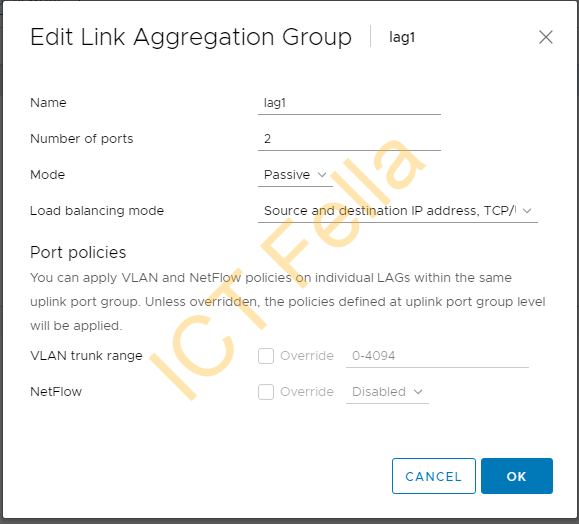
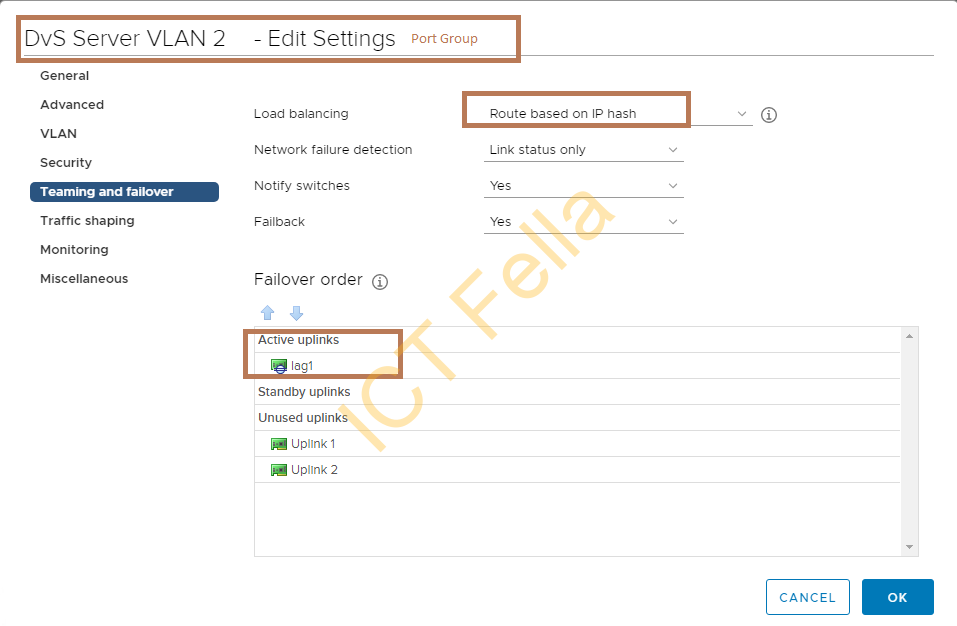
Please be aware under each port group, the load balancing mode is “Route based on IP hash“, this is the compatible configuration for Juniper Switch LACP. Also make sure the newly created LAG NIC is in “Active uplinks”
Change to Migrate to Distributed Switch
Evacuated all the VM out of the first ESXi node – live migrate all the VM out to other nodes, just to be safe
Note: Please conduct below steps one at a time. This is to mitigate any possible issues we are dealing with Production Environment.
Step1: Shutdown the secondary NIC on the VMware ESXi host using CLI
esxcli network nic down -n vmnic2Step2: Configure the Core/Top of Rack switch to enable LACP on the switch port that connected to VMNIC2 of ESXi host. Here we configure the aggregated port with one single port, just for now 🙂
set interfaces xe-1/0/0 description "Node 1 – VMNIC2"
set interfaces xe-1/0/0 ether-options 802.3ad ae1

set interfaces ae1 aggregated-ether-options lacp active
set interfaces ae1 aggregated-ether-options lacp periodic slow
set interfaces ae1 unit 0 family ethernet-switching interface-mode trunk
set interfaces ae1 unit 0 family ethernet-switching vlan members all
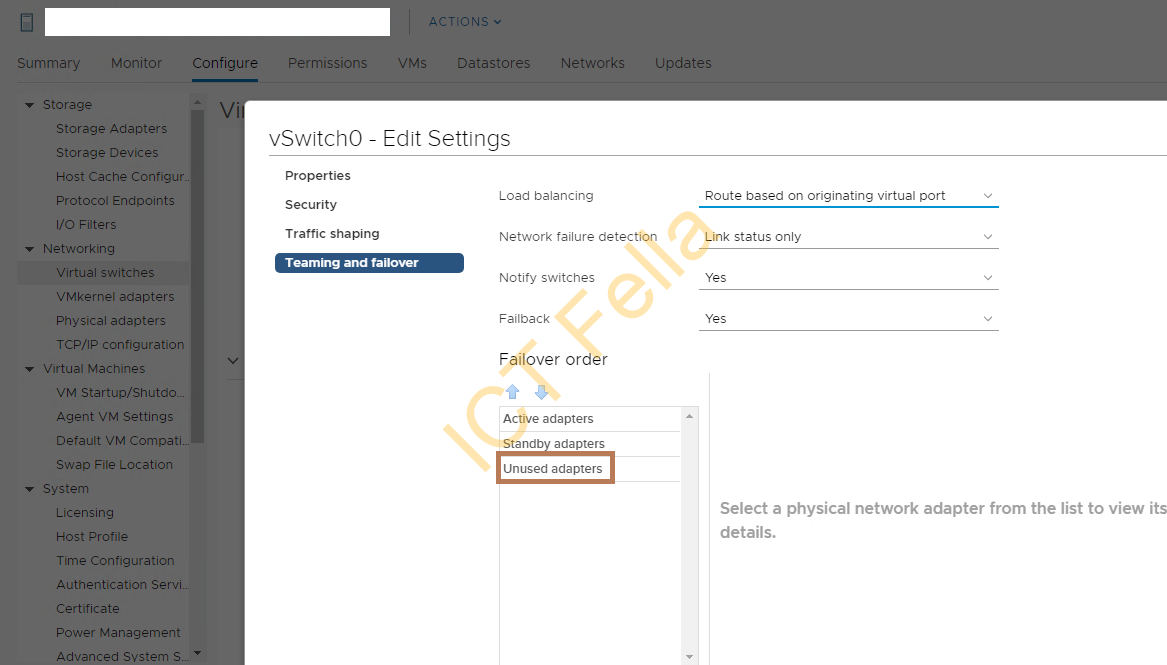
Step3: Move the VMNIC2 down into the “unused ports” in the original standard virtual switch, in the screenshot below, we have migrated all NIC out of this virtual standard switch
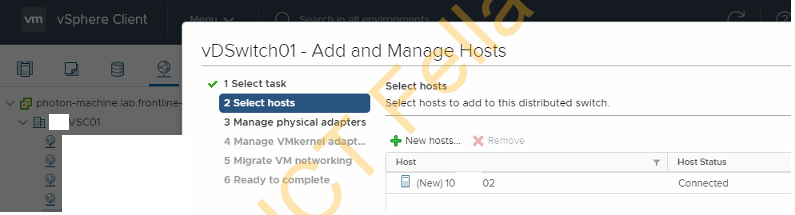
Step4 :run “Add and Manage Hosts” wizard, add physicals host only, not adding any physical adapters , vmkernal or vMotion NICs yet. Complete the wizard.
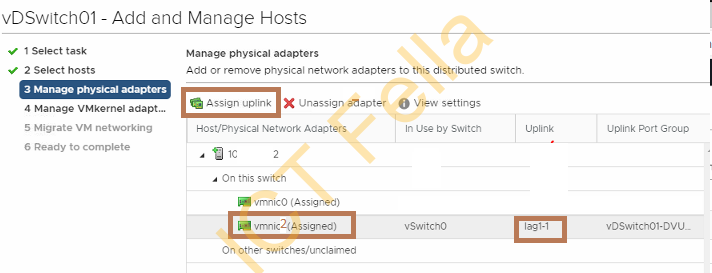
Step5: Add physical uplink ports for the newly created Distributes virtual switch as demonstrated in the VMware official link below, remember to go through the rest of the wizard without touching other local NIC and VM networking, complete the wizard.
Step6: Bring up the VMNIC2 in CLI and check in vCenter GUI and confirm it appears correctly
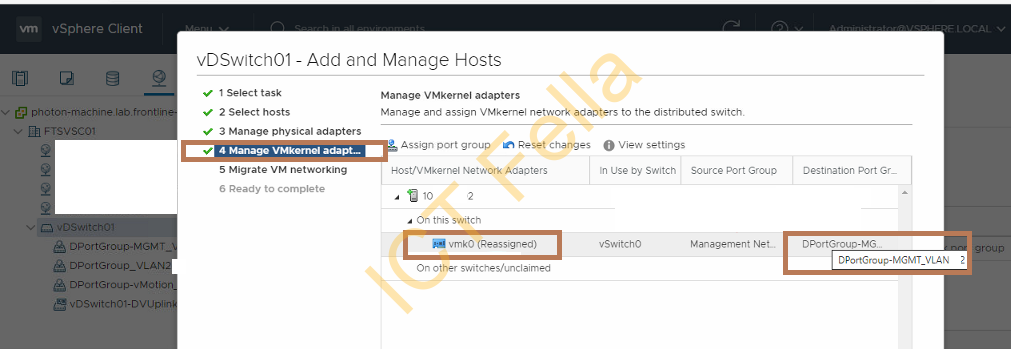
esxcli network nic up -n vmnic2Step7: Migrate the vmkernal NIC for for ESXi host management via running “vDSwitch01 – Add and Manage Host wizard”, complete the wizard.
Step8: Running the vmKernal NIC for vMotion if applicable, complete the wizard
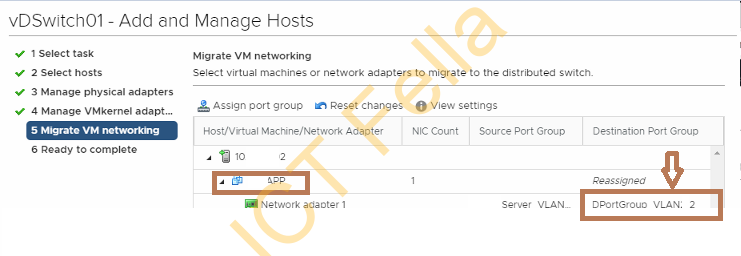
Step9: Migrate the production VM you want to migrate and change the port group to corresponding DvS port groups you just created
Step10: Once all VM are out of the old virtual standard switch, check the virtual Standard Switch and remove the first NIC(move to unused NICs), please refer to Step 3
Step11: Shut down the first NIC via ESXi CLI:
esxcli network nic down -n vmnic1Add the first NIC in DvS uplink, please refer to Step 5
On the network side, add the 2nic port into aggregated interface in the core/ToR switch, the below is an example for Juniper switch
set interfaces xe-0/0/0 description "Node 1 – VMNIC1"
set interfaces xe-0/0/0 ether-options 802.3ad ae1
Finally bring up the first NIC via ESXi CLI
"esxcli network nic up -n vmnic1"Repeat the process for rest the nodes in the cluster